Send emails via SMTP relay with Azure Communication Service
&edge_flat=false)
We’ve come across multiple cases where customers want to send emails from Applications migrated to Azure through some kind of SMTP service. Though we’ve seen customers opting for O365 for SMTP relay, this can create issues due to throttling limitations in Office Service. Also, managing mailbox and license assignment on Office 365 console is a different story; customers would want to have seamless SMTP relay service experience from single console on Azure.
Though Azure Communication service supports sending emails outbound but currently it requires you to integrate it via the ACS SDK that Microsoft provide. In scenarios where you don’t want to modify code and just change the pointing of your SMTP server to Azure, you can now use ACS - SMTP relay built into Email communication service.
Azure Communication Service supports different types of notifications, SMTP relay in ACS got GA last month and this blog post is simple step by step instructions of how you can quickly test the service and then migrate from Sendgrid or another service you’re using to native ACS – Email communication service for better operational experience and support.
Based on the insights and questions received, I’ve also created part 2 of this blog. click here to learn more about ACS Email service
High level steps are as follows:
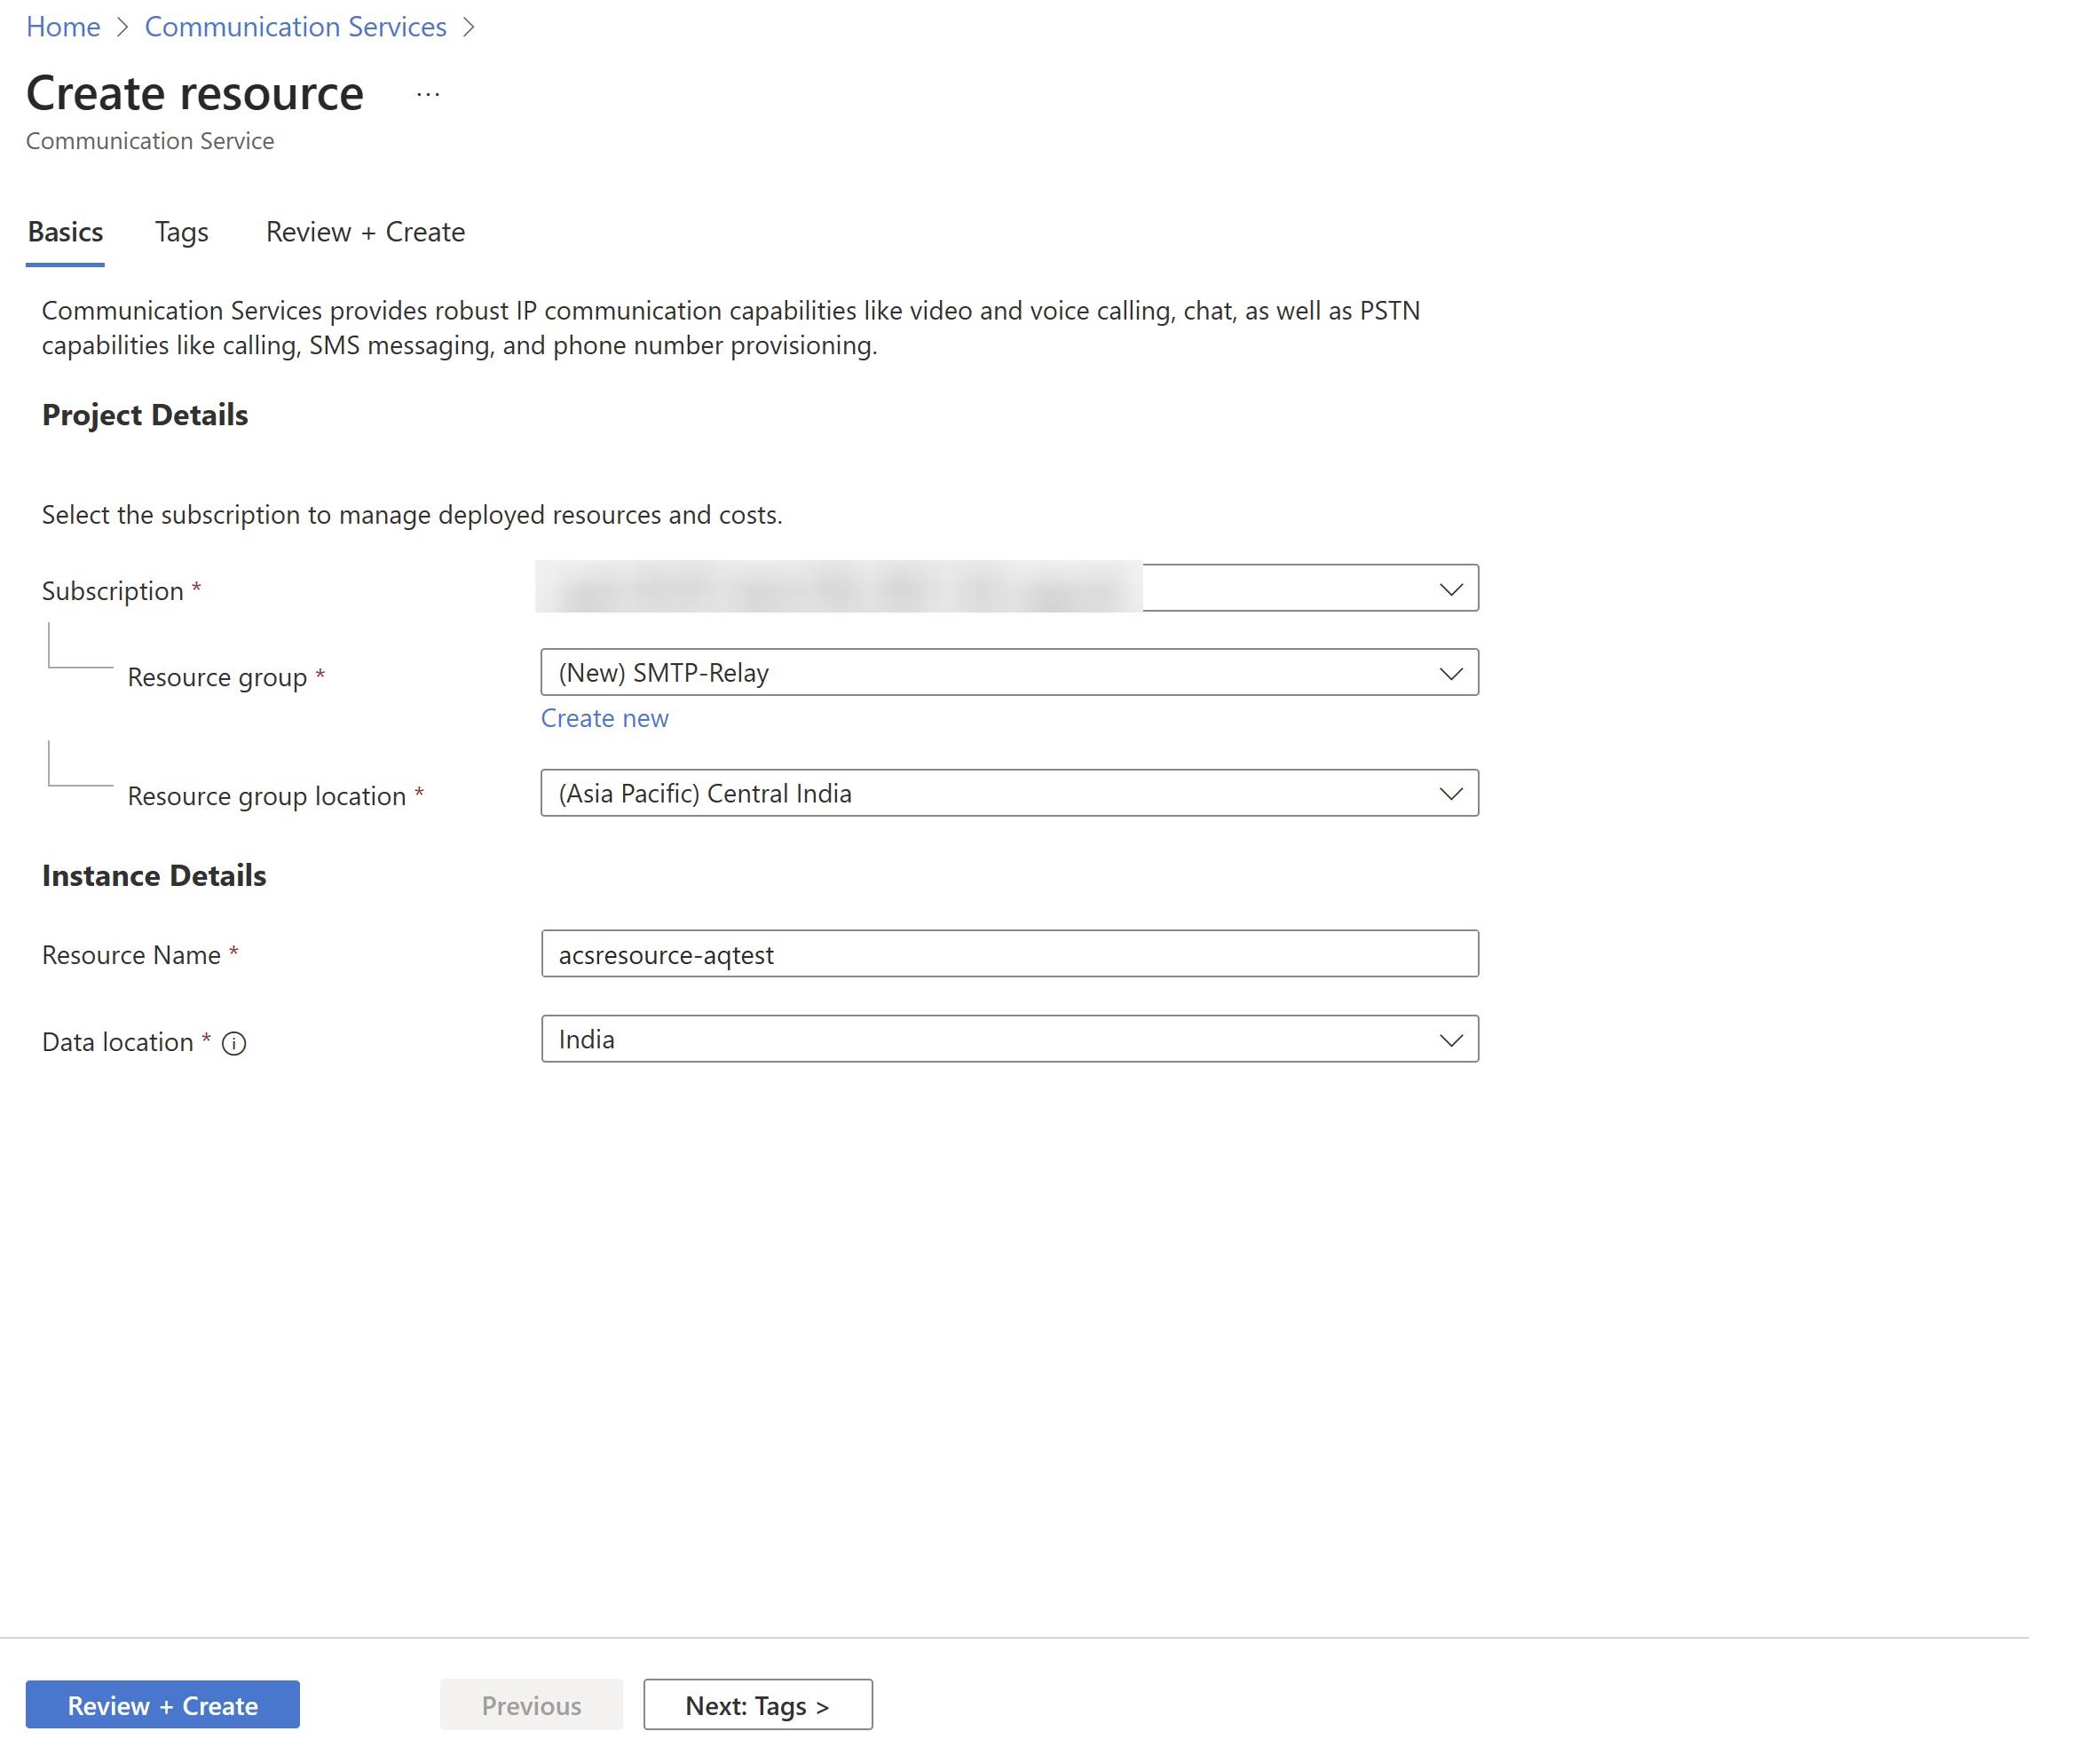
1. Create Azure Communication Service Account
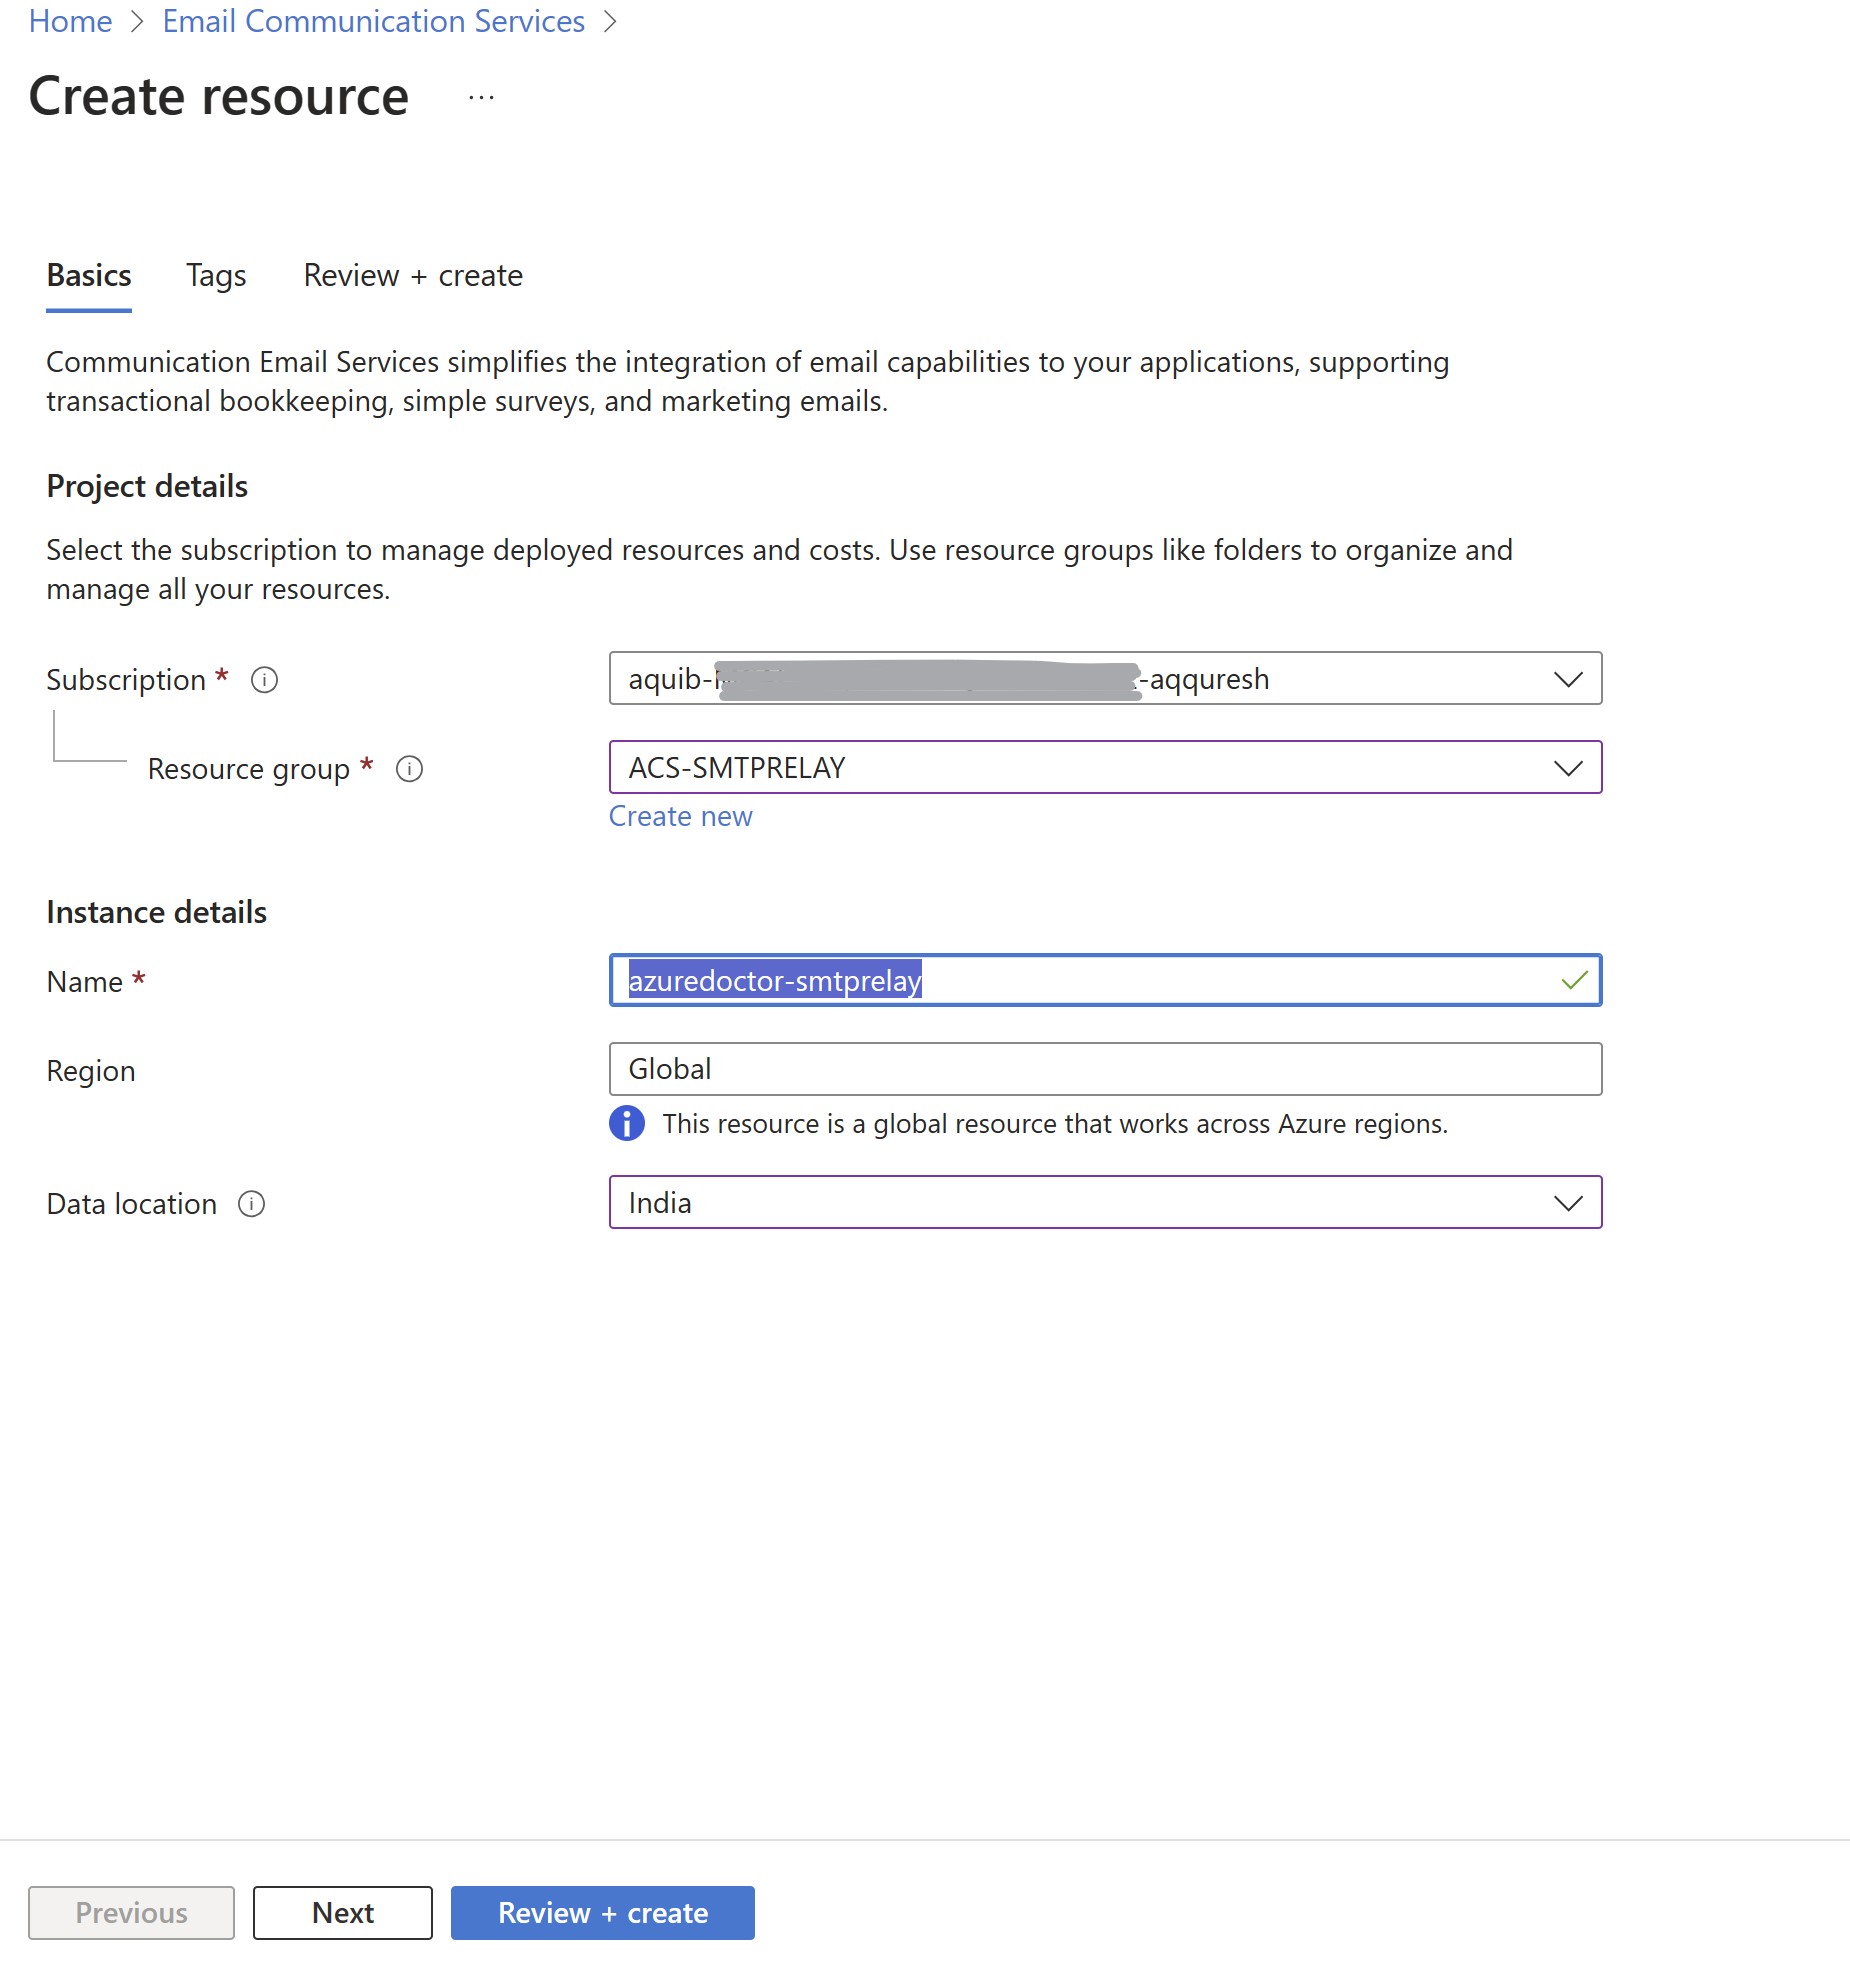
2. Create Email communication service
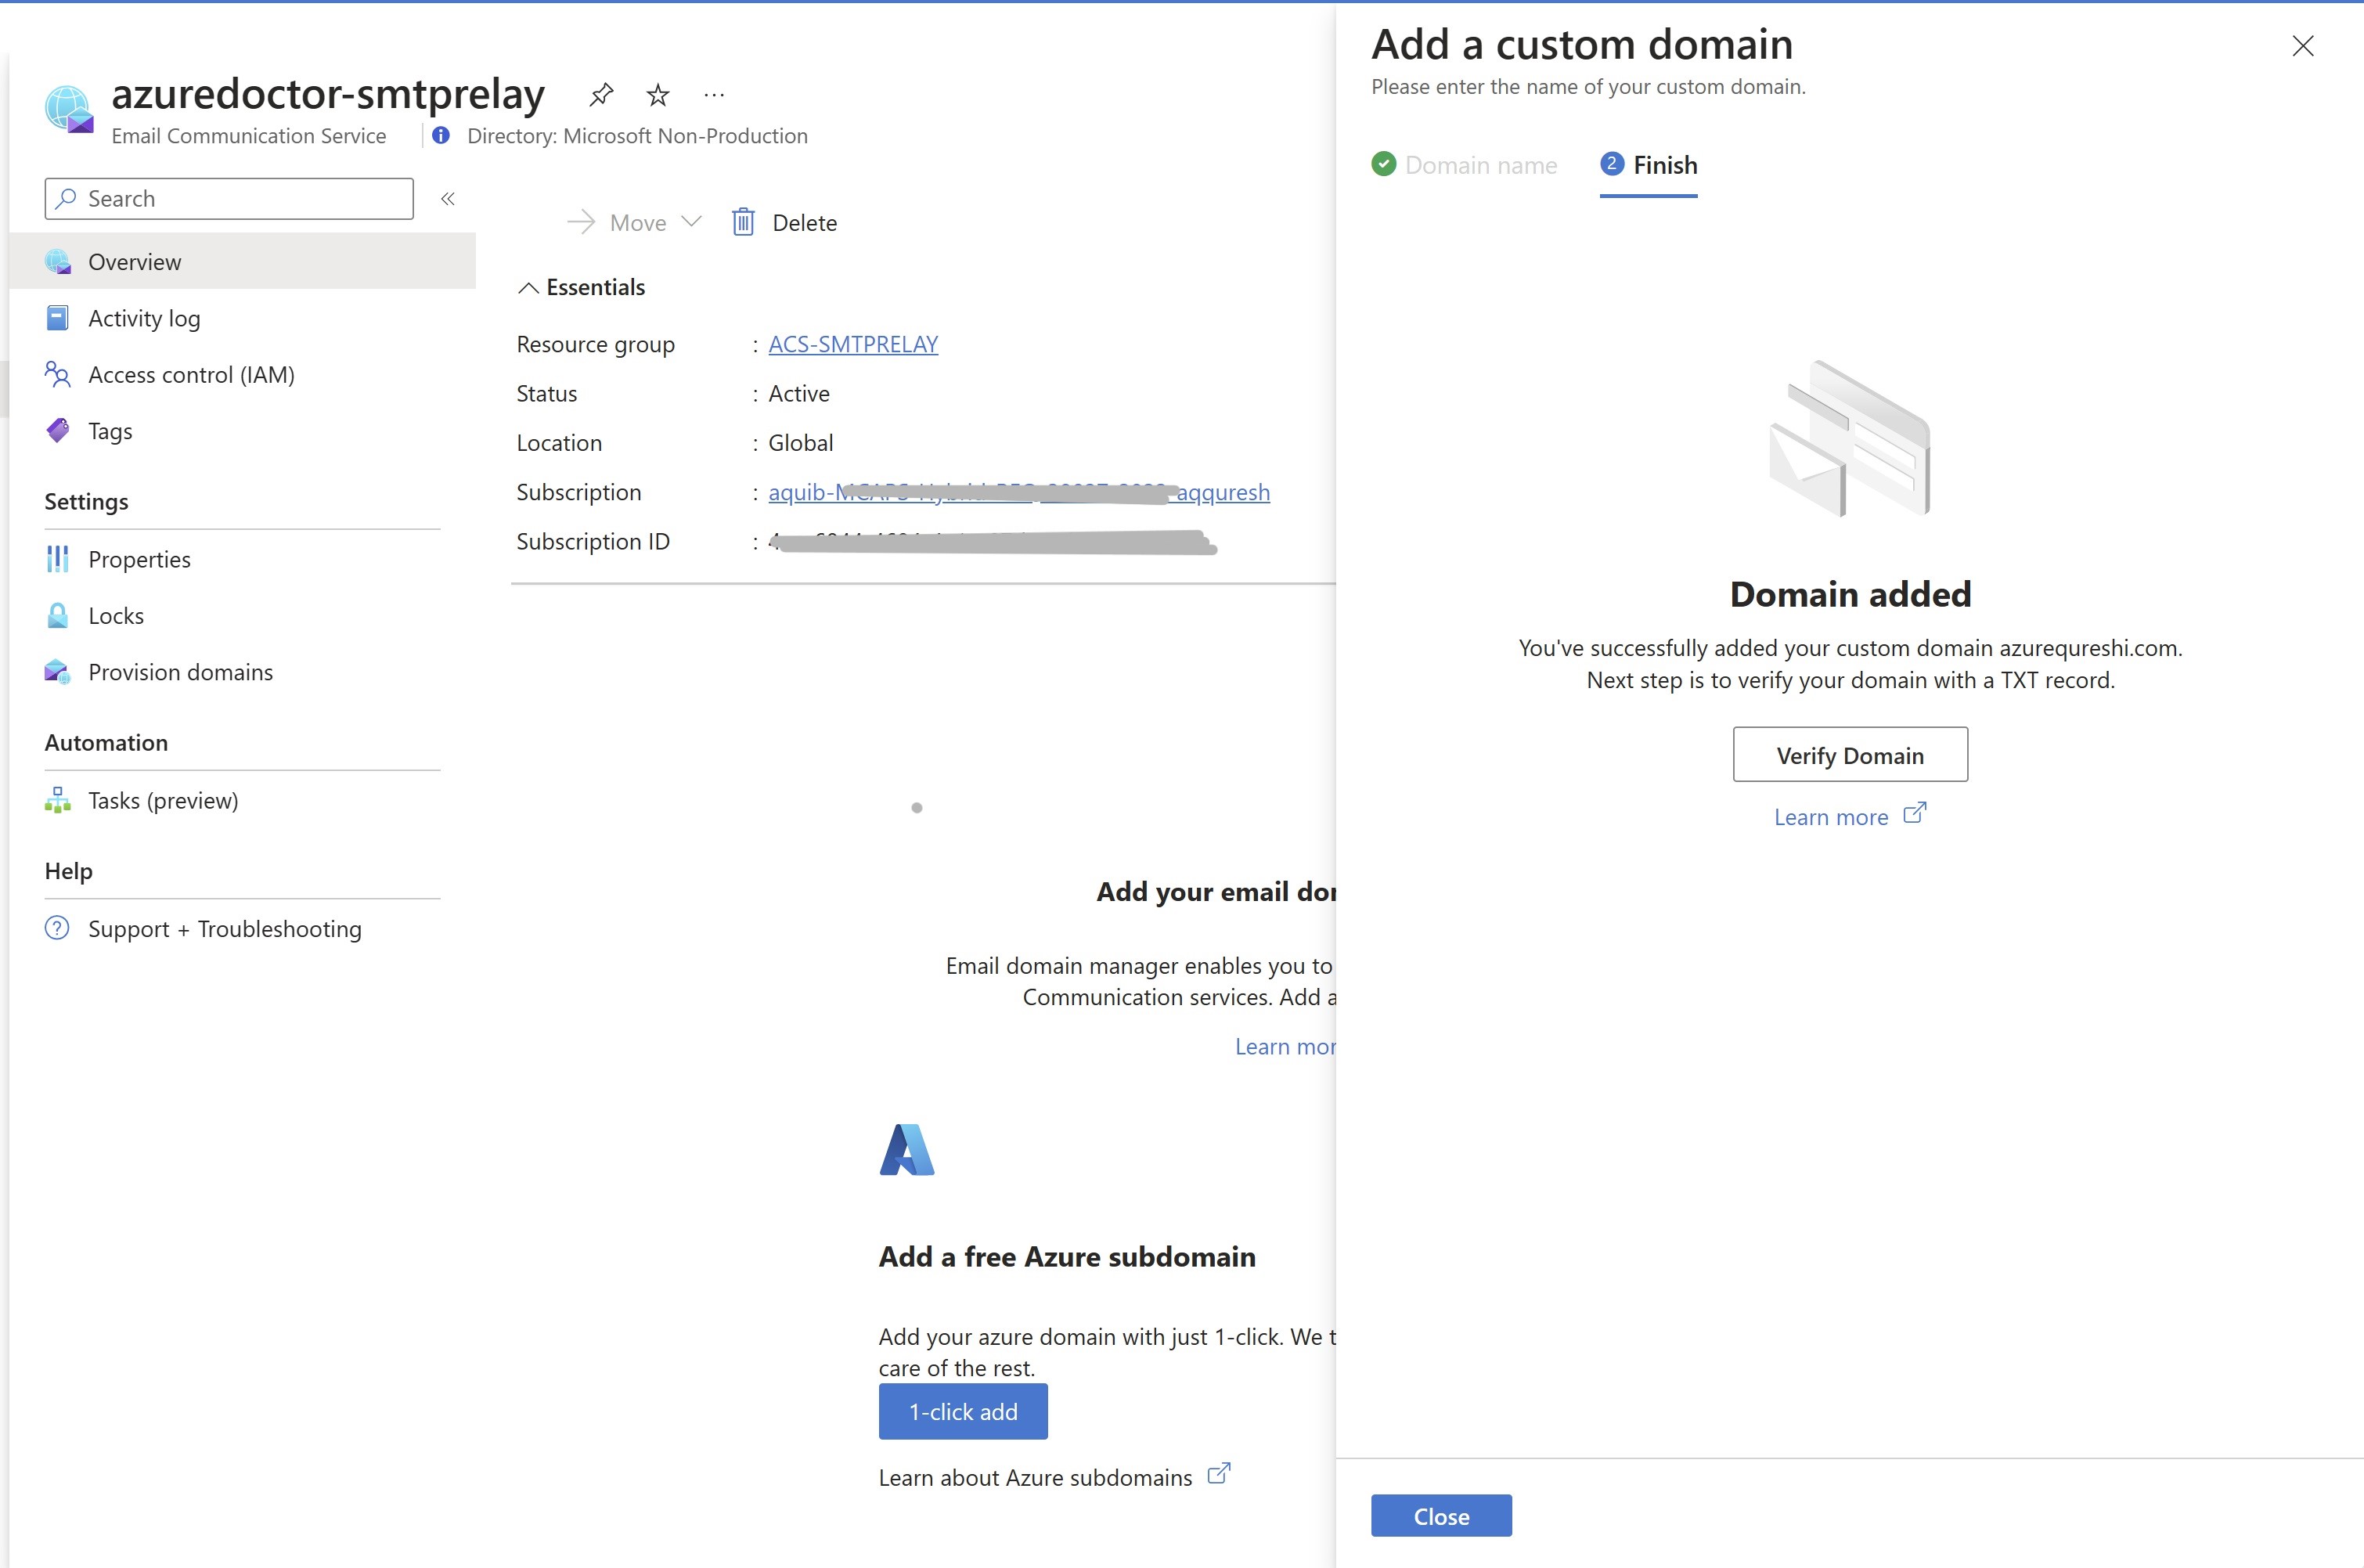
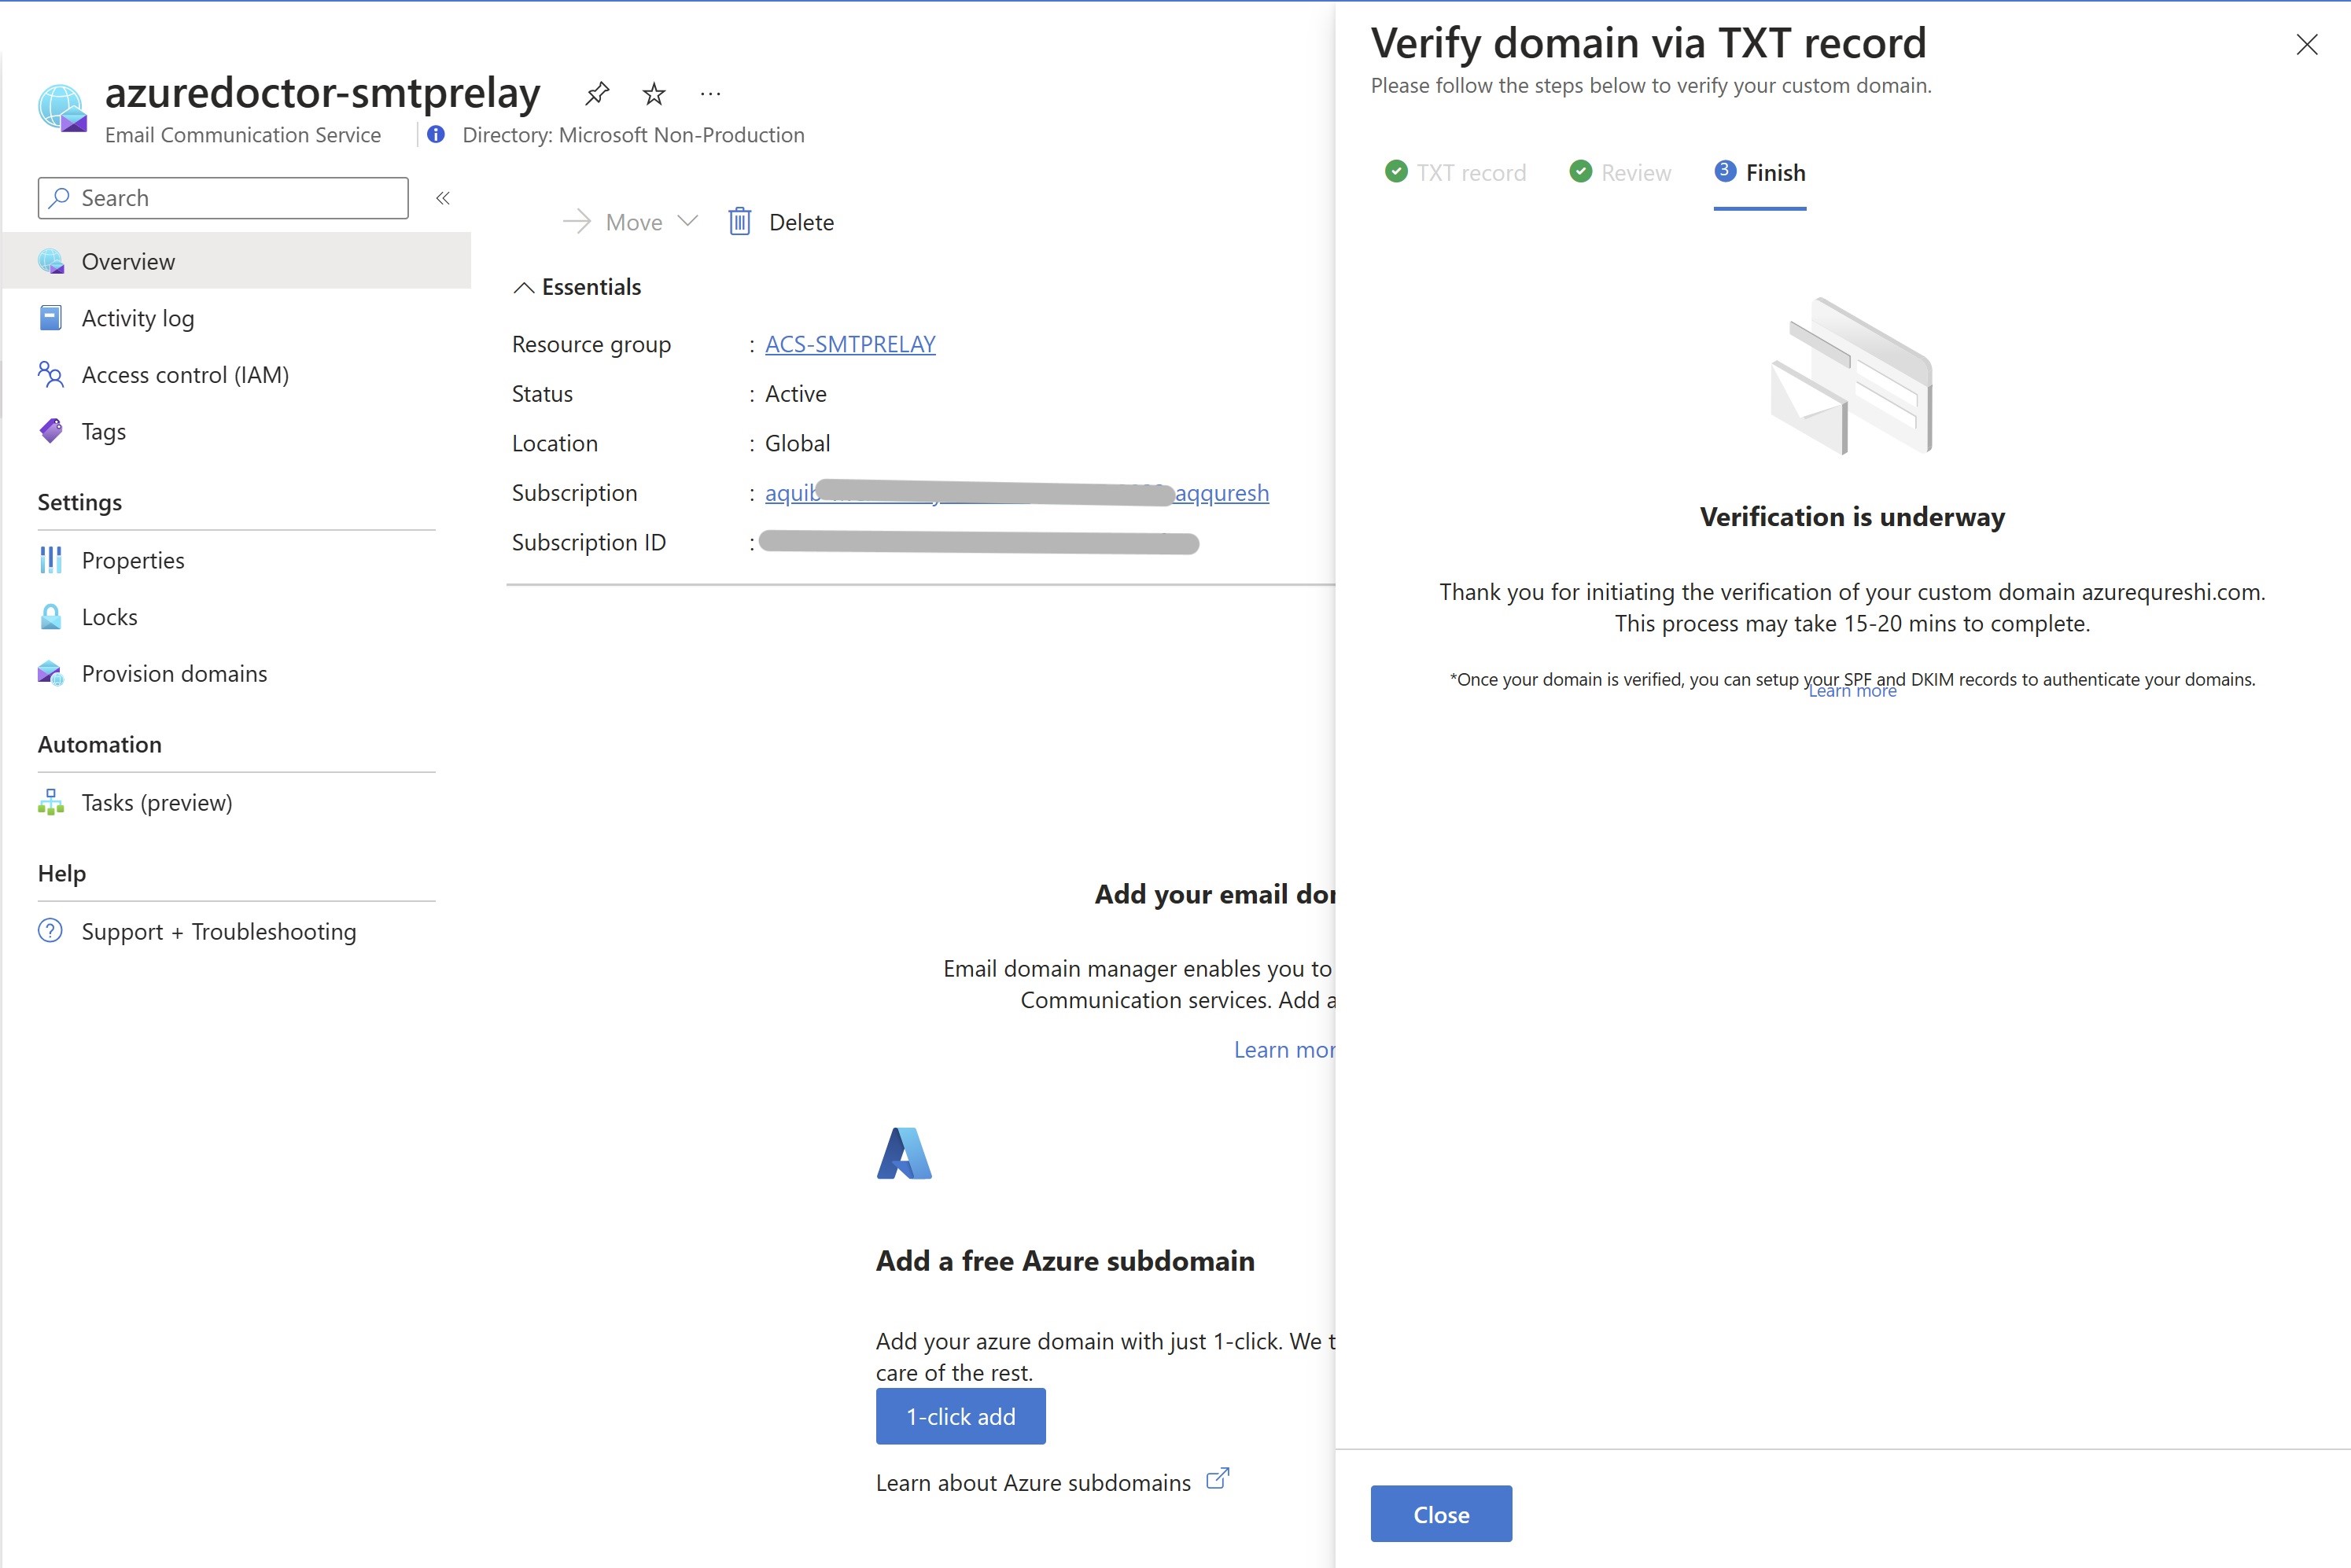
3. Add a custom domain to ECS
4. Attach custom domain to ACS Account
5. Create and Assign custom RBAC Role for Authentication
6. Test SMTP Relay via Powershell
1. Create Azure Communication Service Account
First step you’ll need to do is to create an ACS account. This is a parent service which has multiple notification services inside it(Chat,SMS, Email etc). Email communications service is one of them.
2. Create Email communication service
We’ll have to create ECS which is the actual service that holds configuration details.
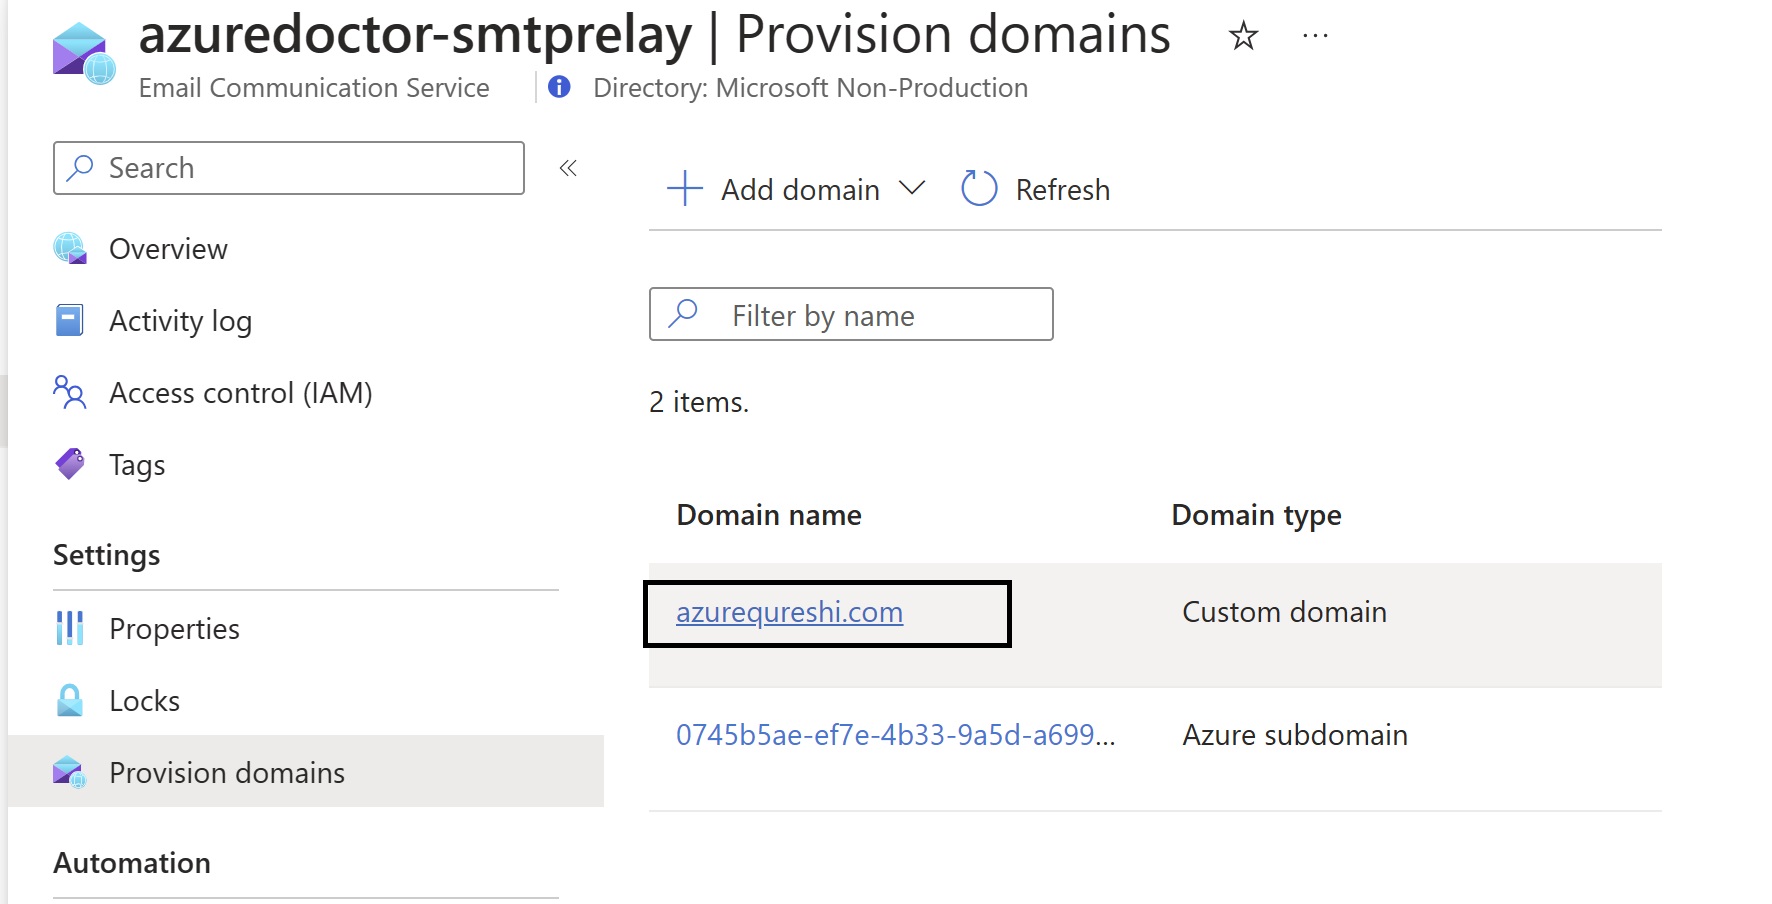
3. Add a custom domain to ECS
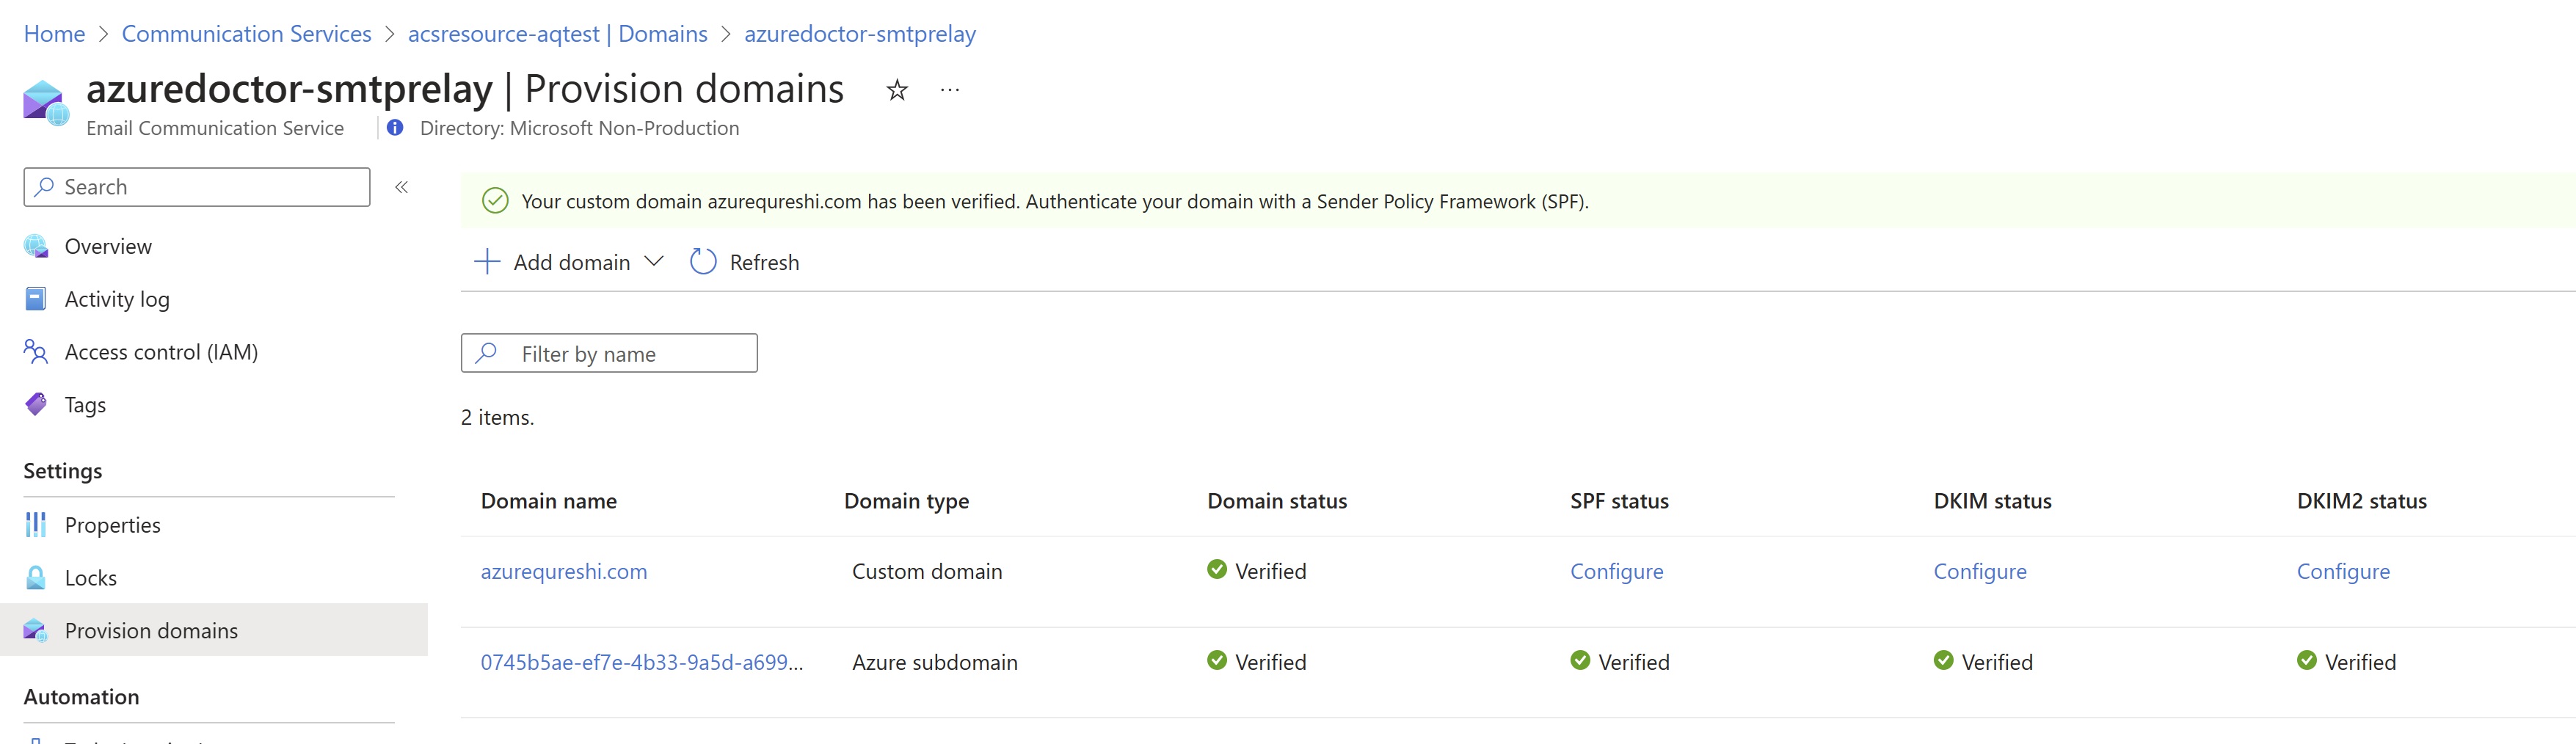
ECS provides Azure managed domain which look like this “GUID.azurecomm.net” this provides limited volume of email hence using custom domain is preferred. Once you add a custom domain, the UI provides you with TXT record which you’ll need to create in your Name server. This would take 15 minutes to verify the domain
Once domain is verified the screen looks like this, you’ll have to create SPF and DKIM records so that your email doesn’t land in junk and ownership is maintained.
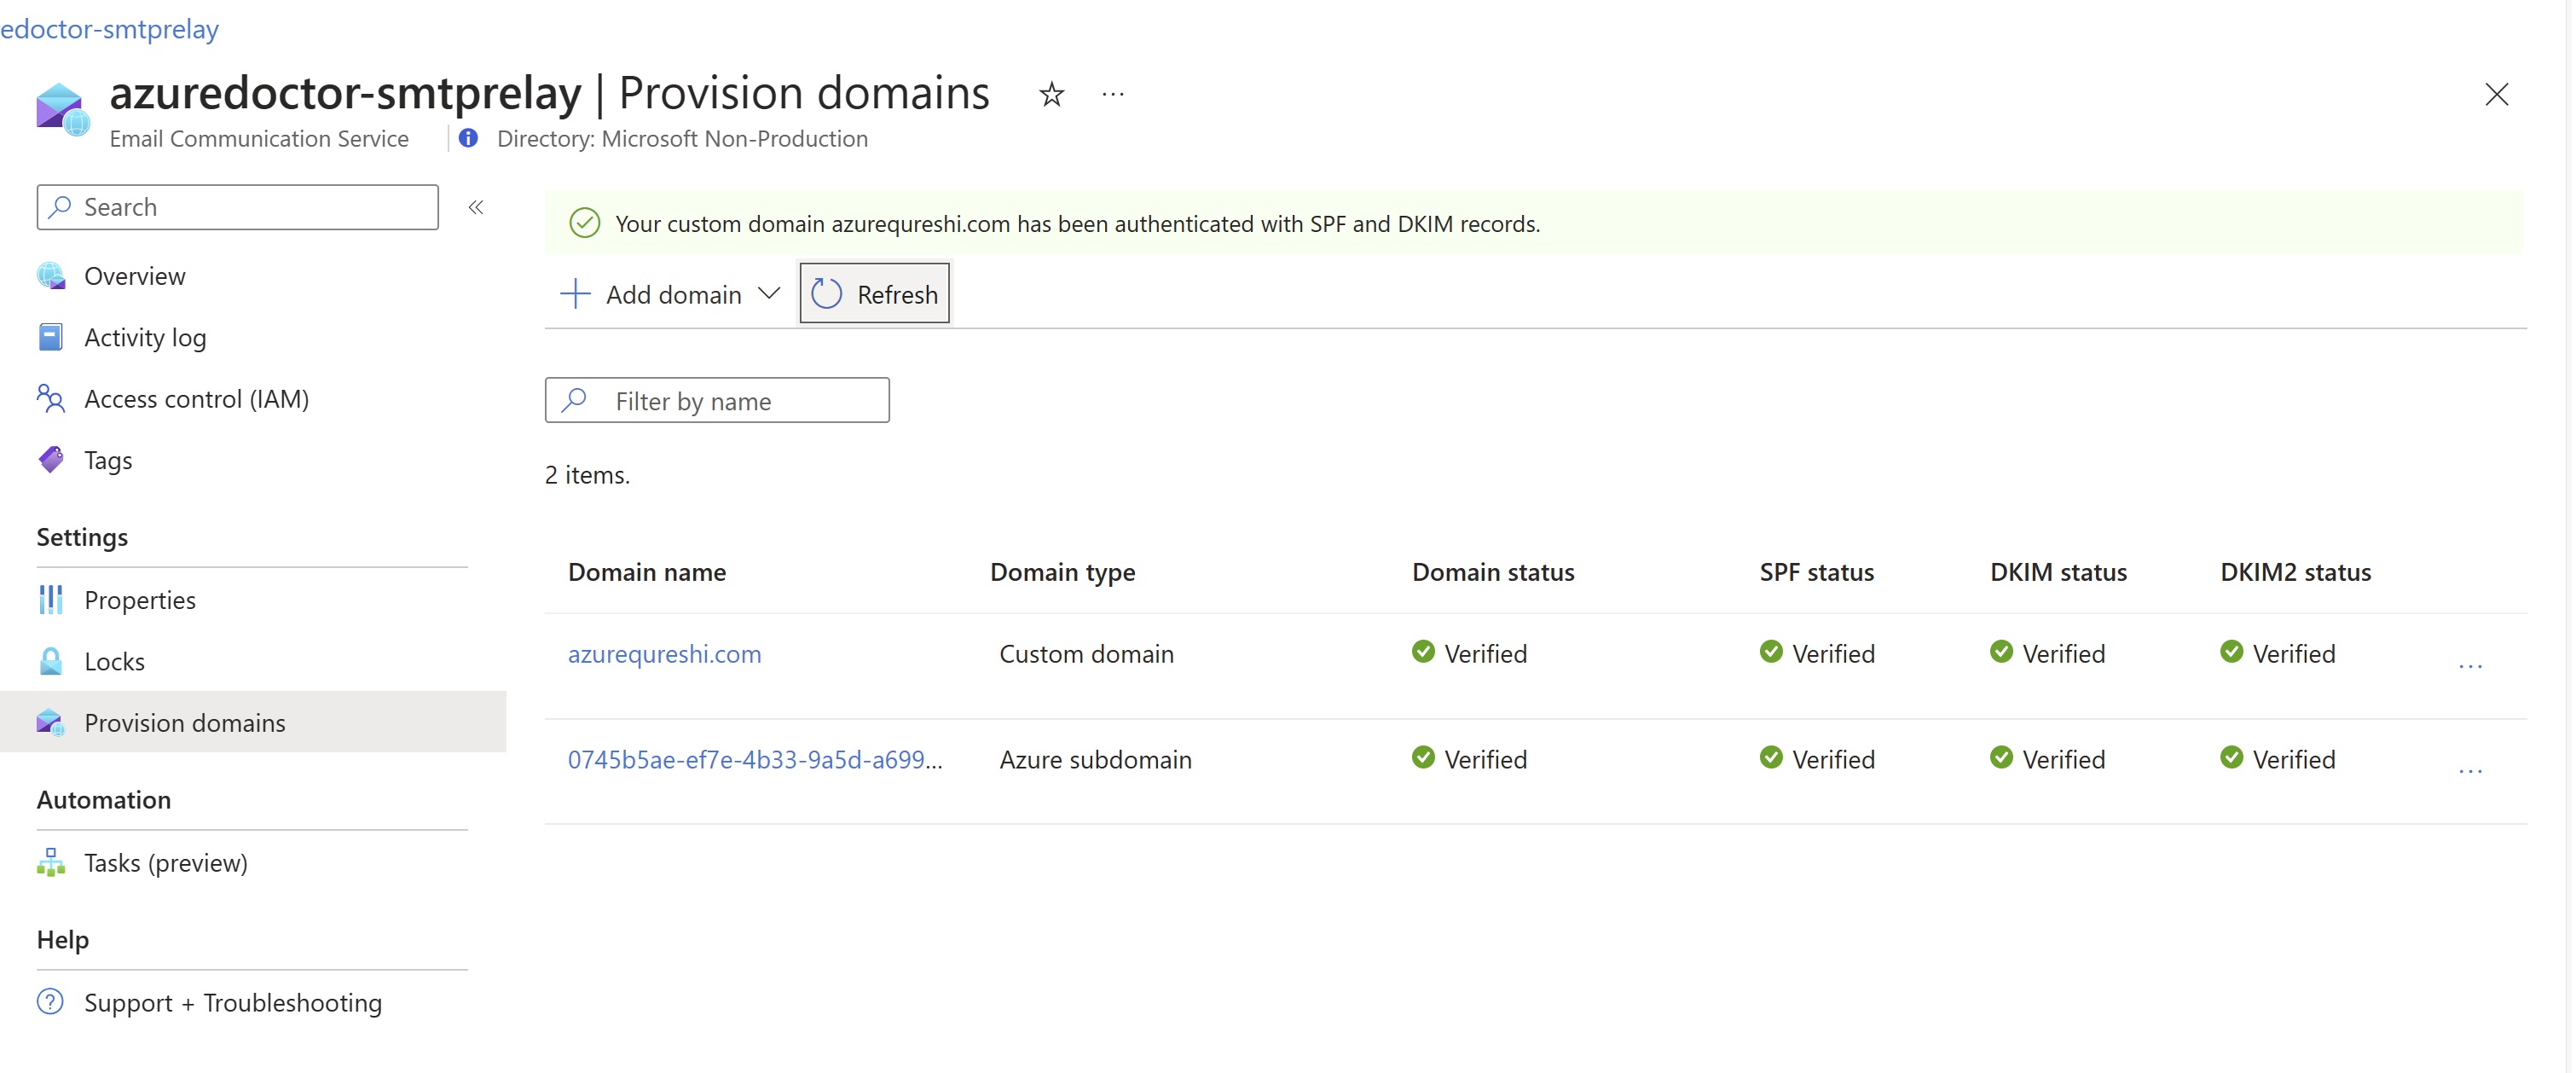
Once all the records are created the screen would look like this, please ignore the azure managed domain. You can only have custom domain in the account and doesn’t have to add Azure Domain explicitly.
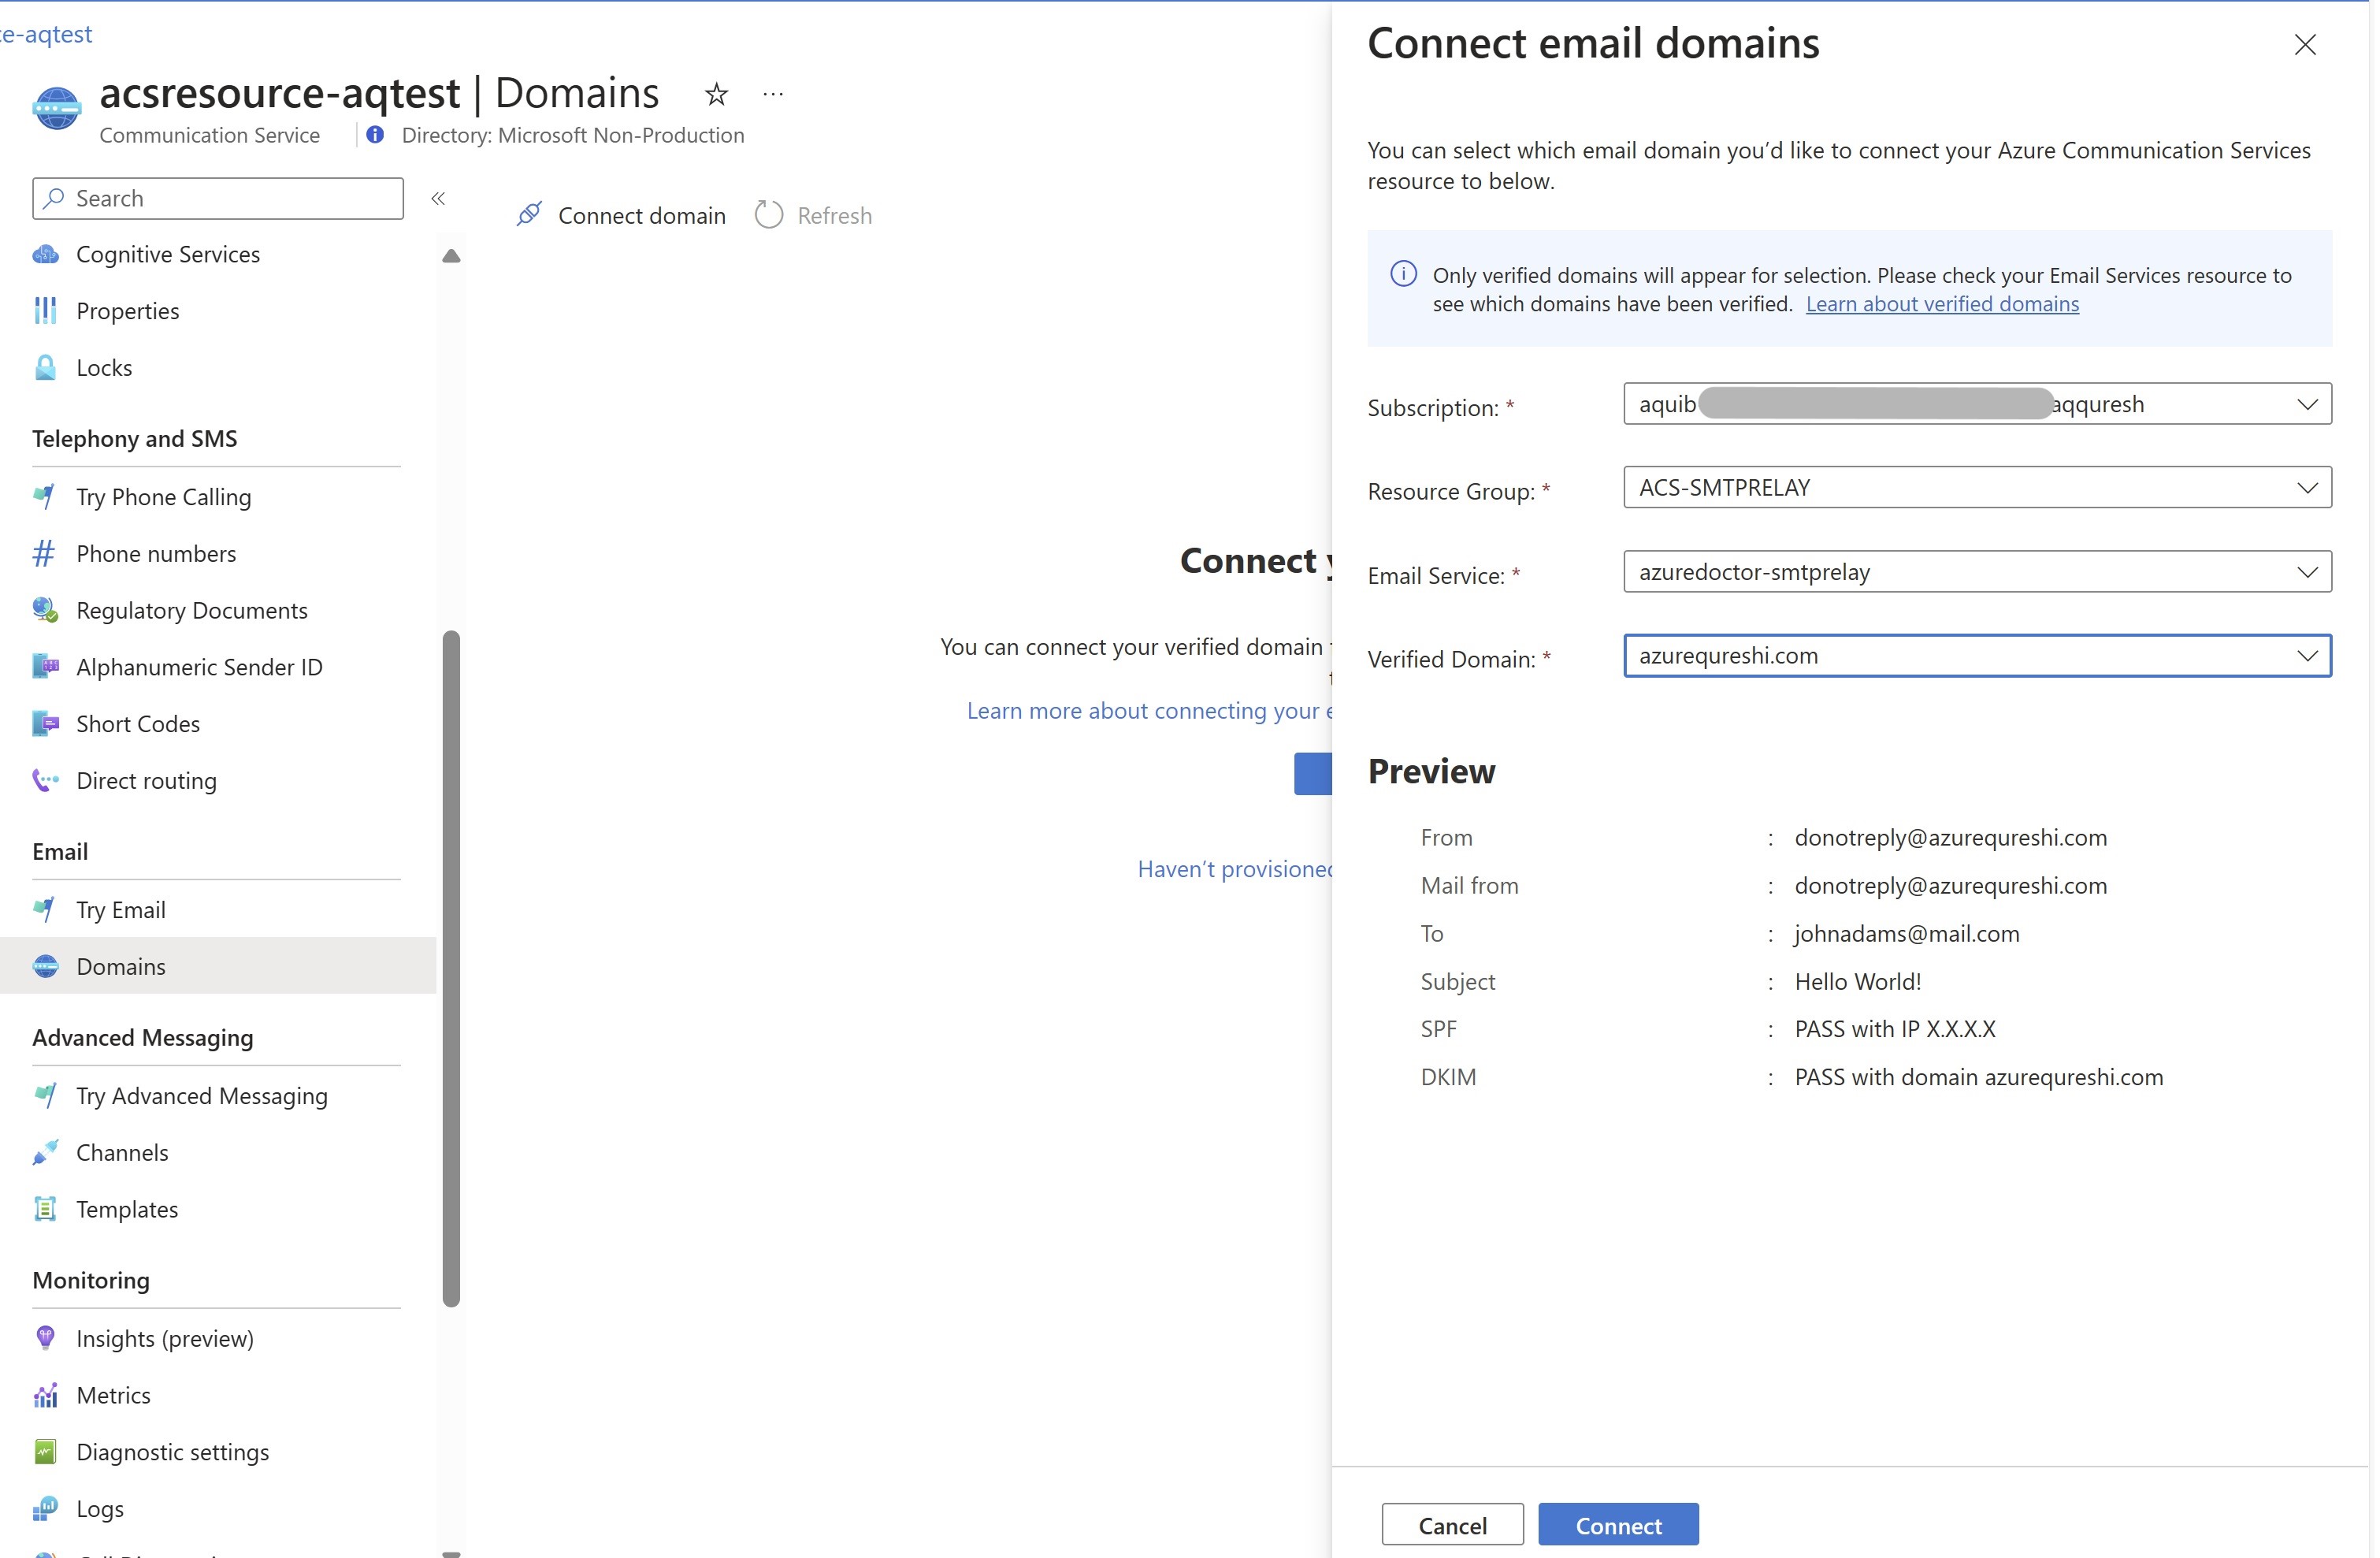
4. Attach custom domain to ACS Account
Once email is validated we’ll need to attach ECS to ACS.
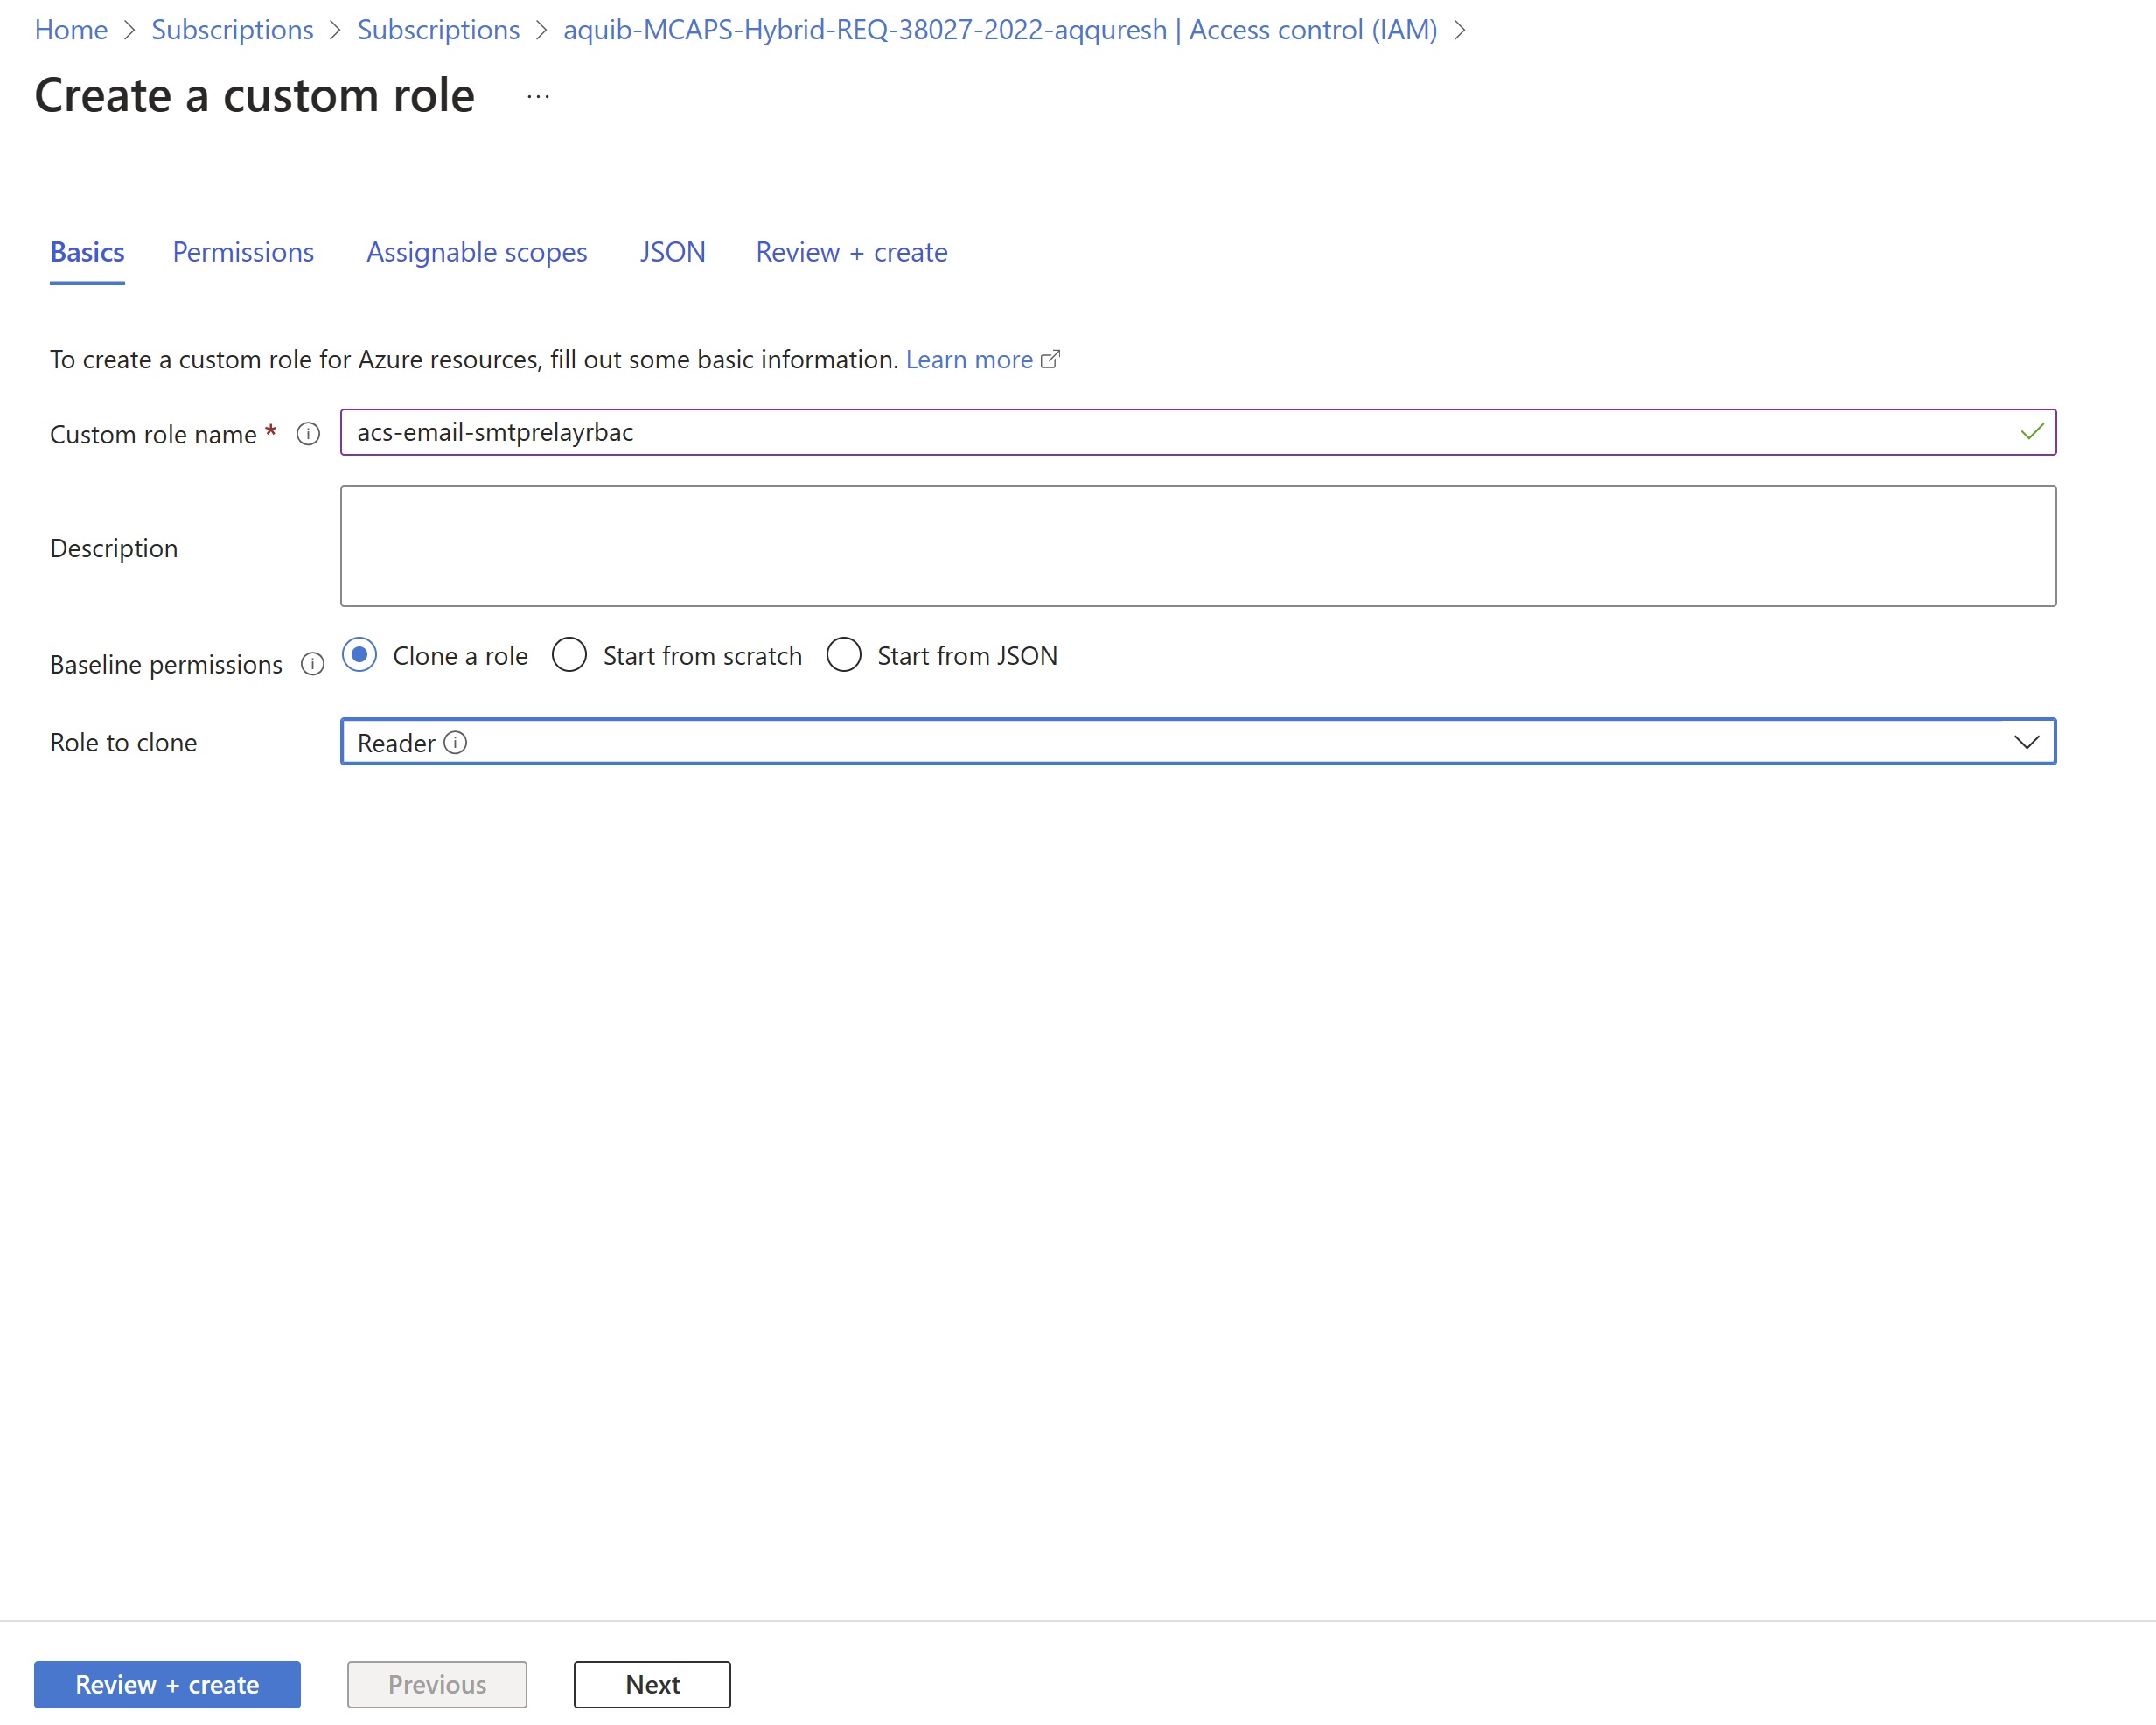
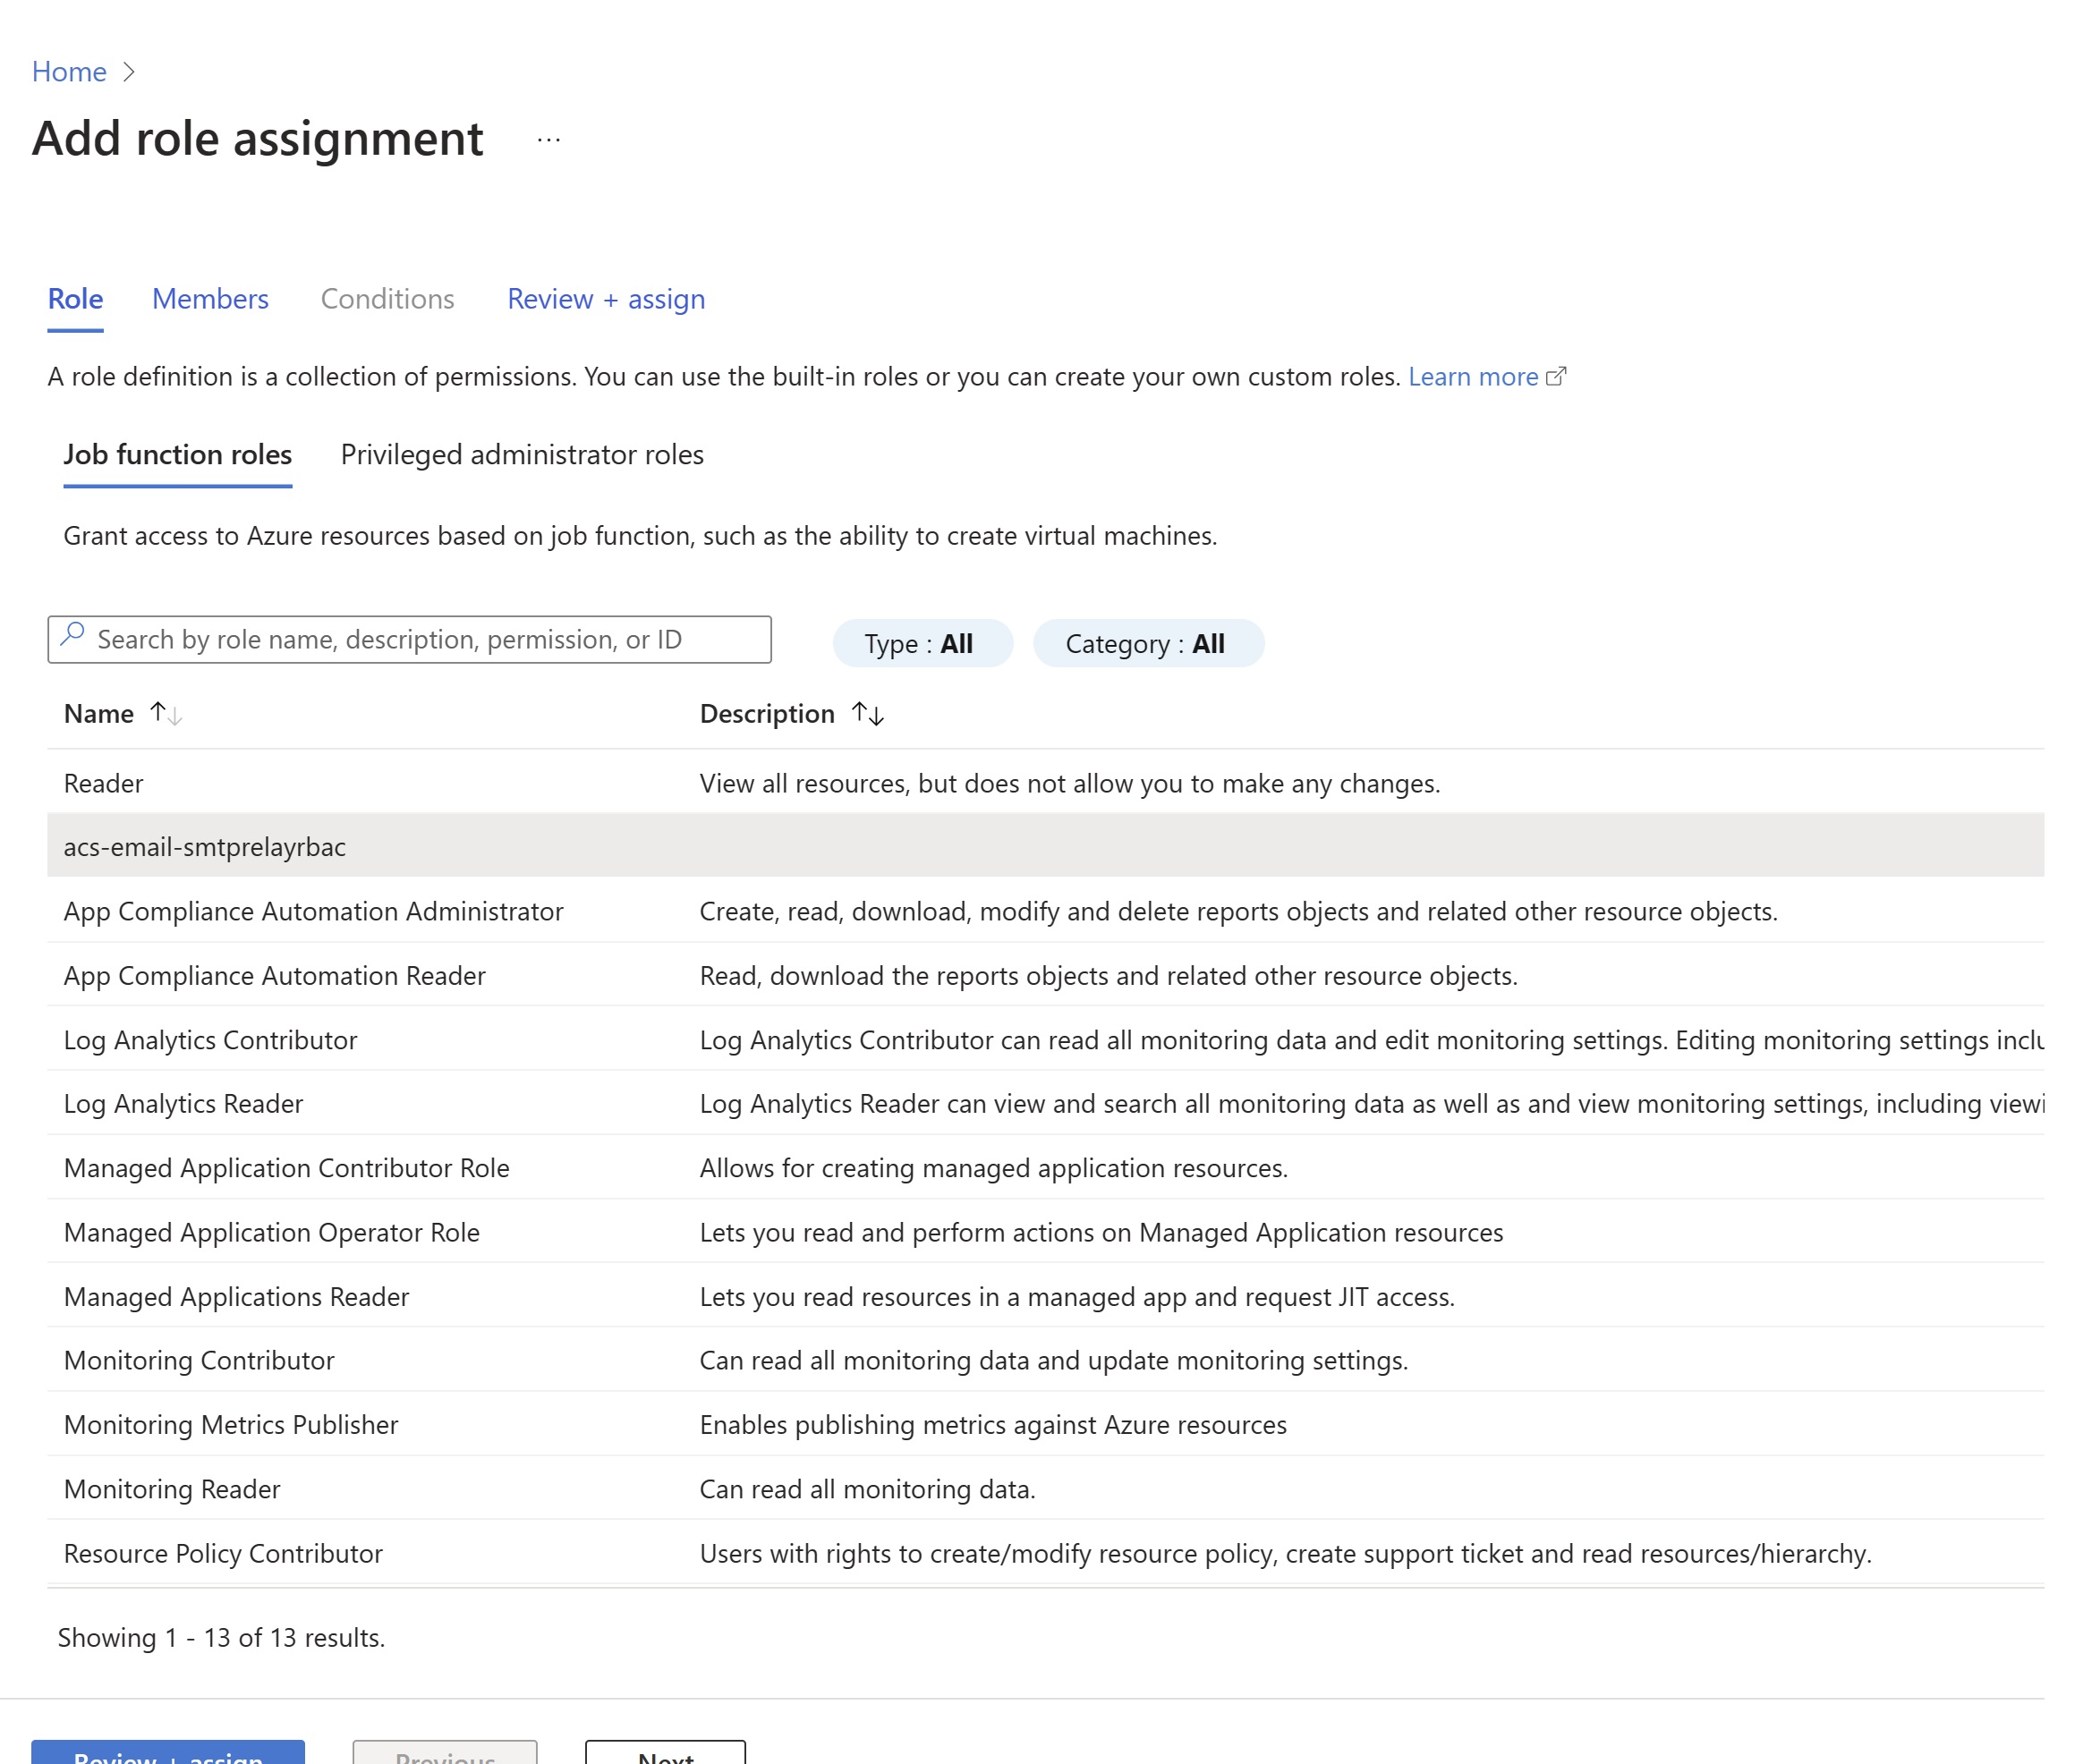
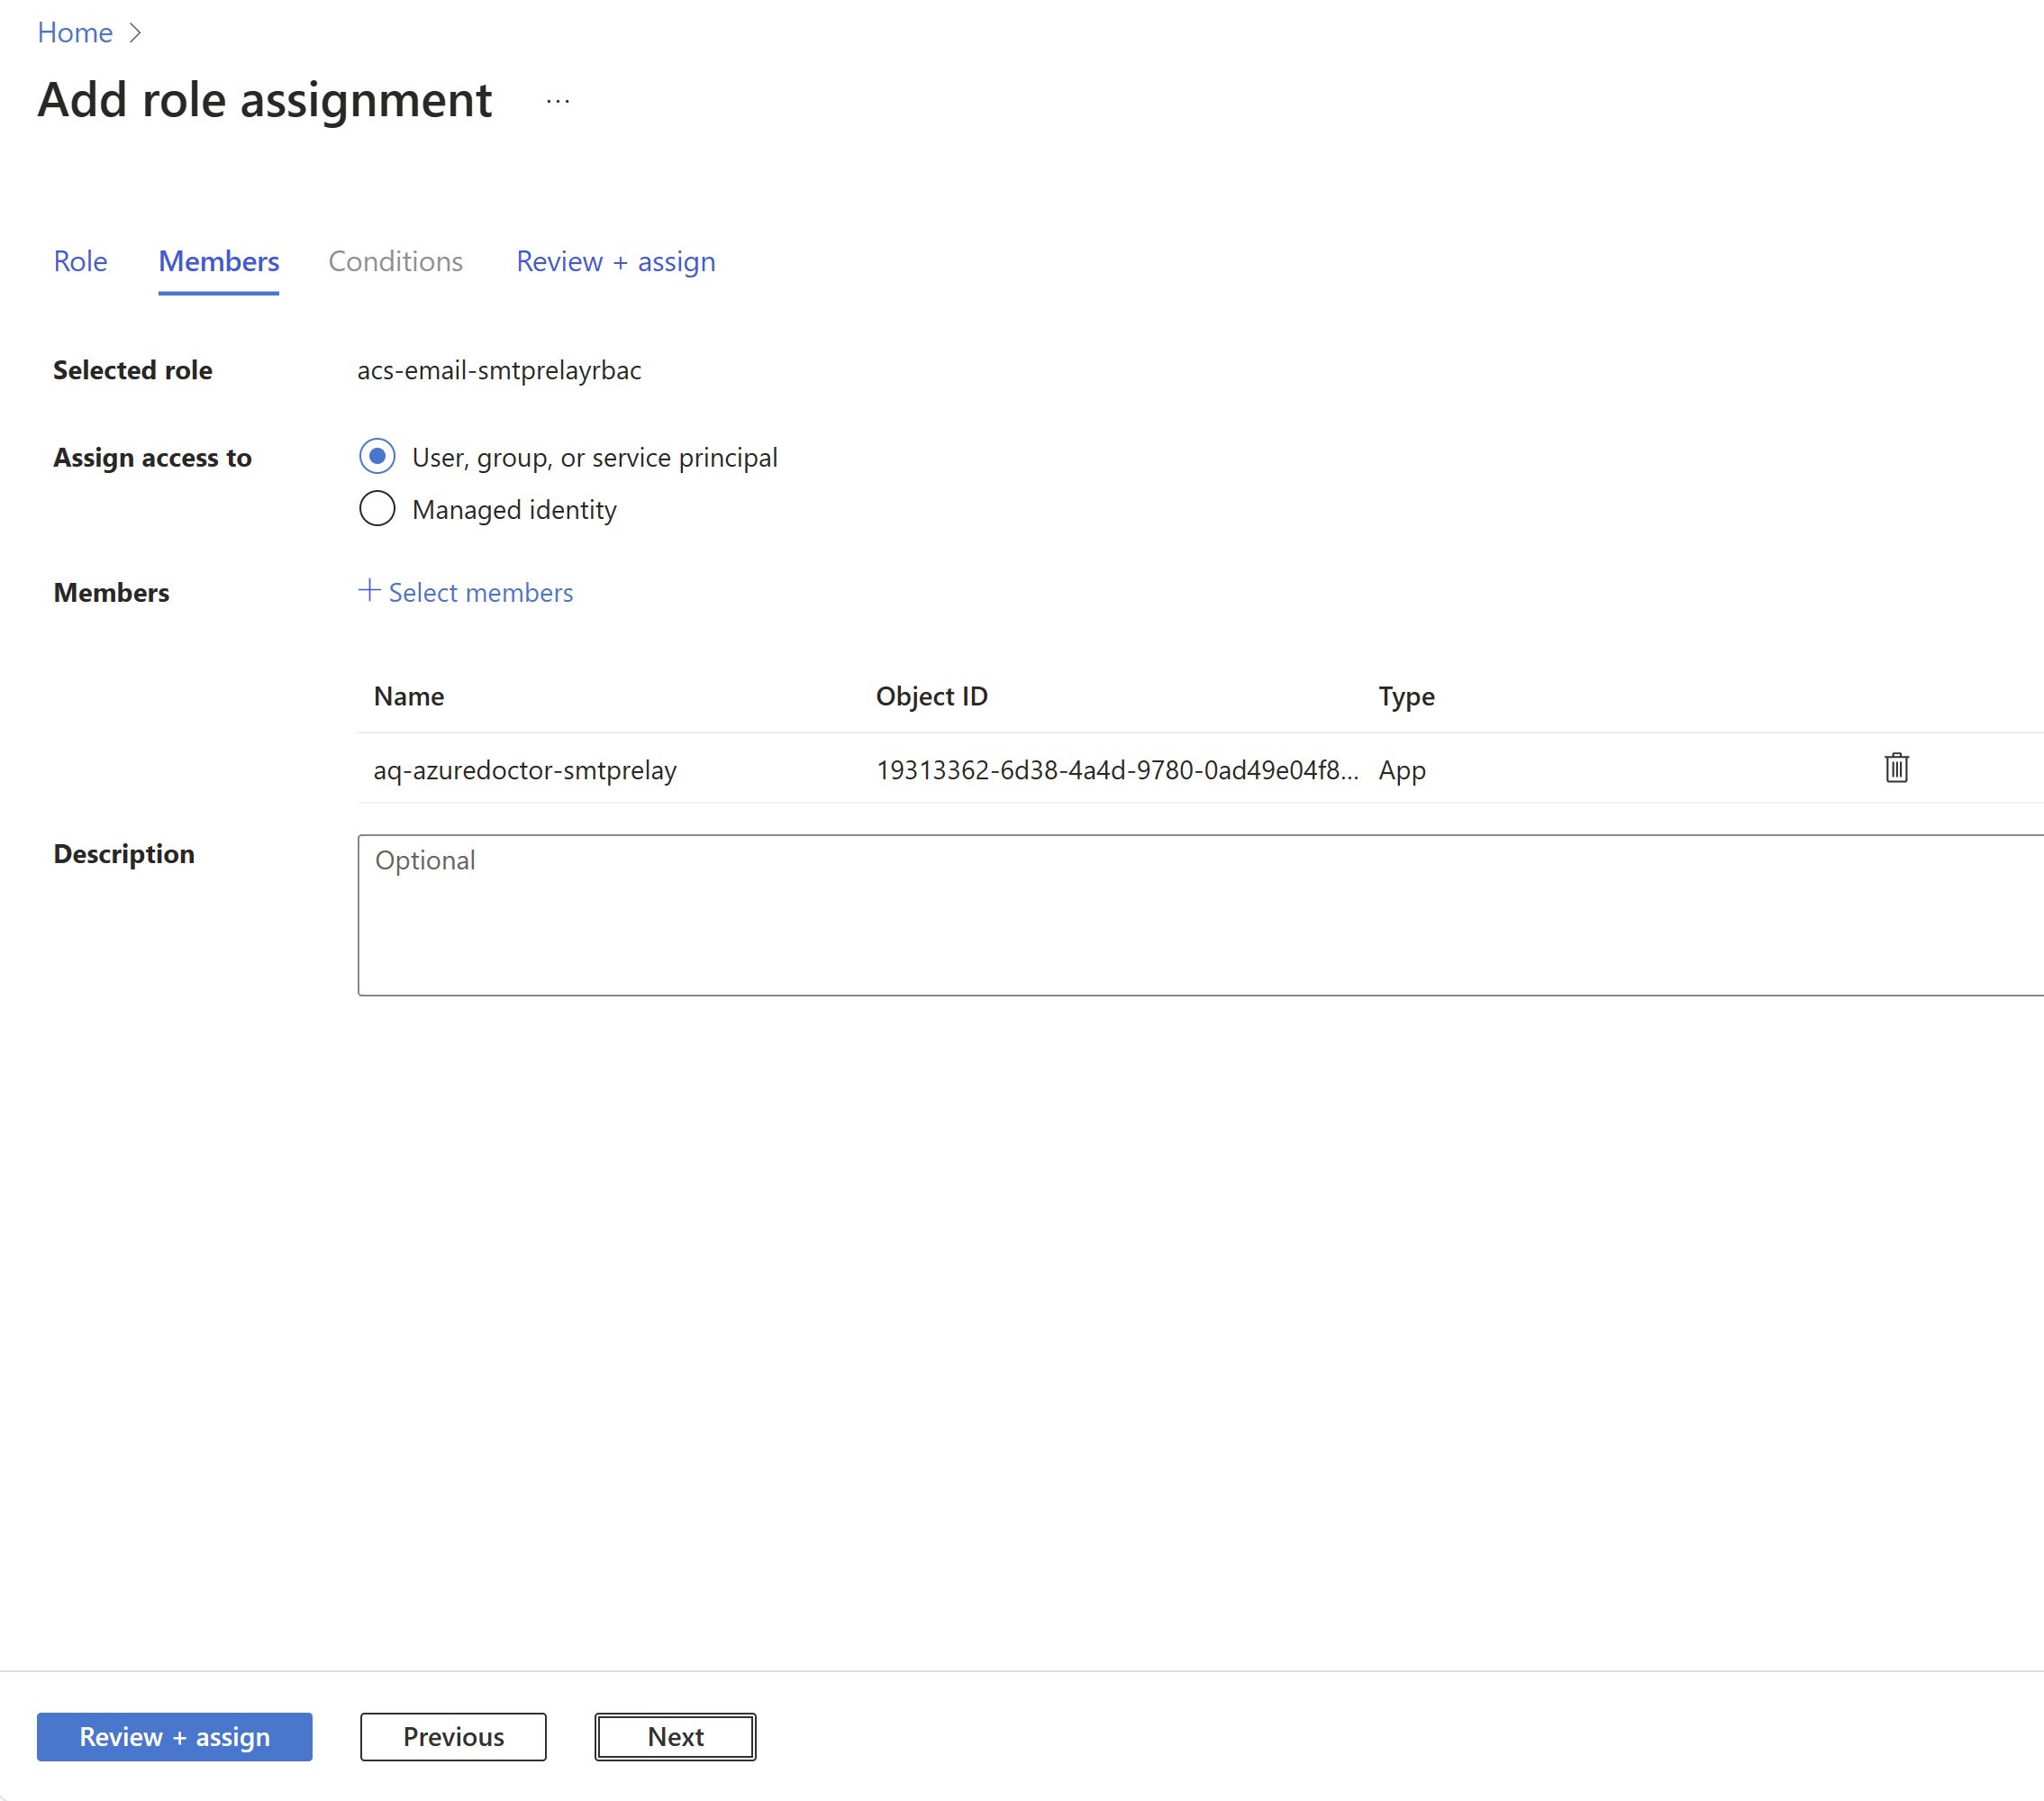
5. Create and Assign custom RBAC Role for Authentication
We’ll be using 587 port to send email which is authenticated SMTP. For authentication we have Entra ID authentication. Create a service principal by going to Entra ID – App registration page. Register the app and create a client secret. Note down Client ID, Tenant ID and Secret value. This will be used in next stage for authentication. We’ll need to create a custom RBAC role which has permission to send email. We’ll clone reader role.
And we’ll be adding two actions which is present in Azure Communication service resource provider.
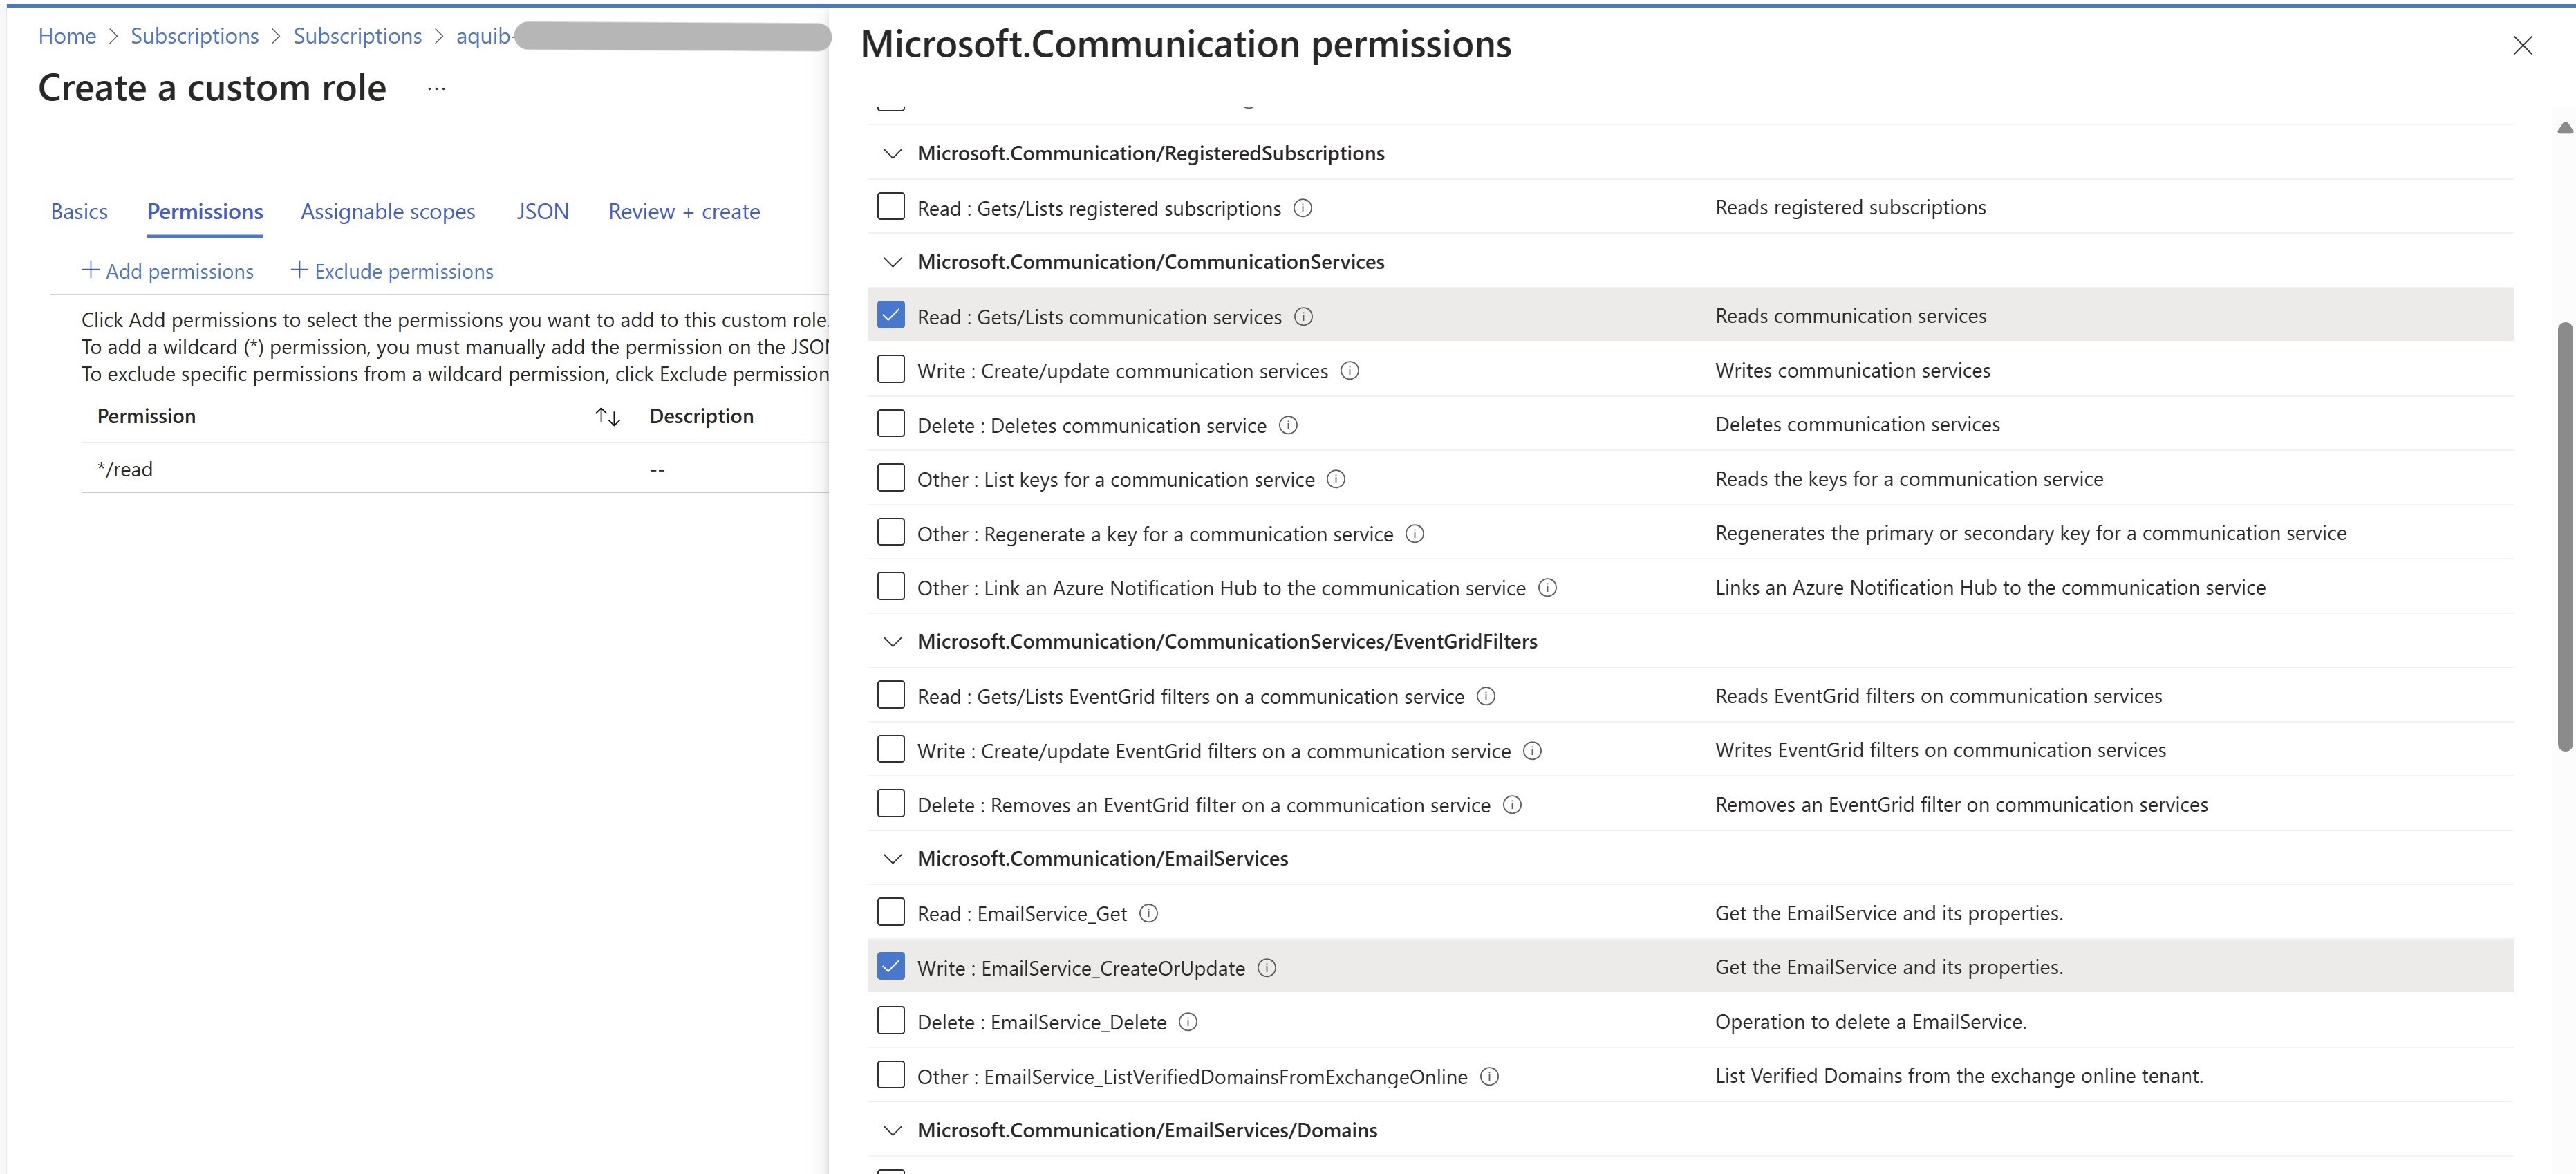
Once the Role is created we’ll need to assign this to service principal
6. Test SMTP Relay via Powershell
That’s all, now you’ll need to find out the sender email. Which is default DoNotReply@domain.com
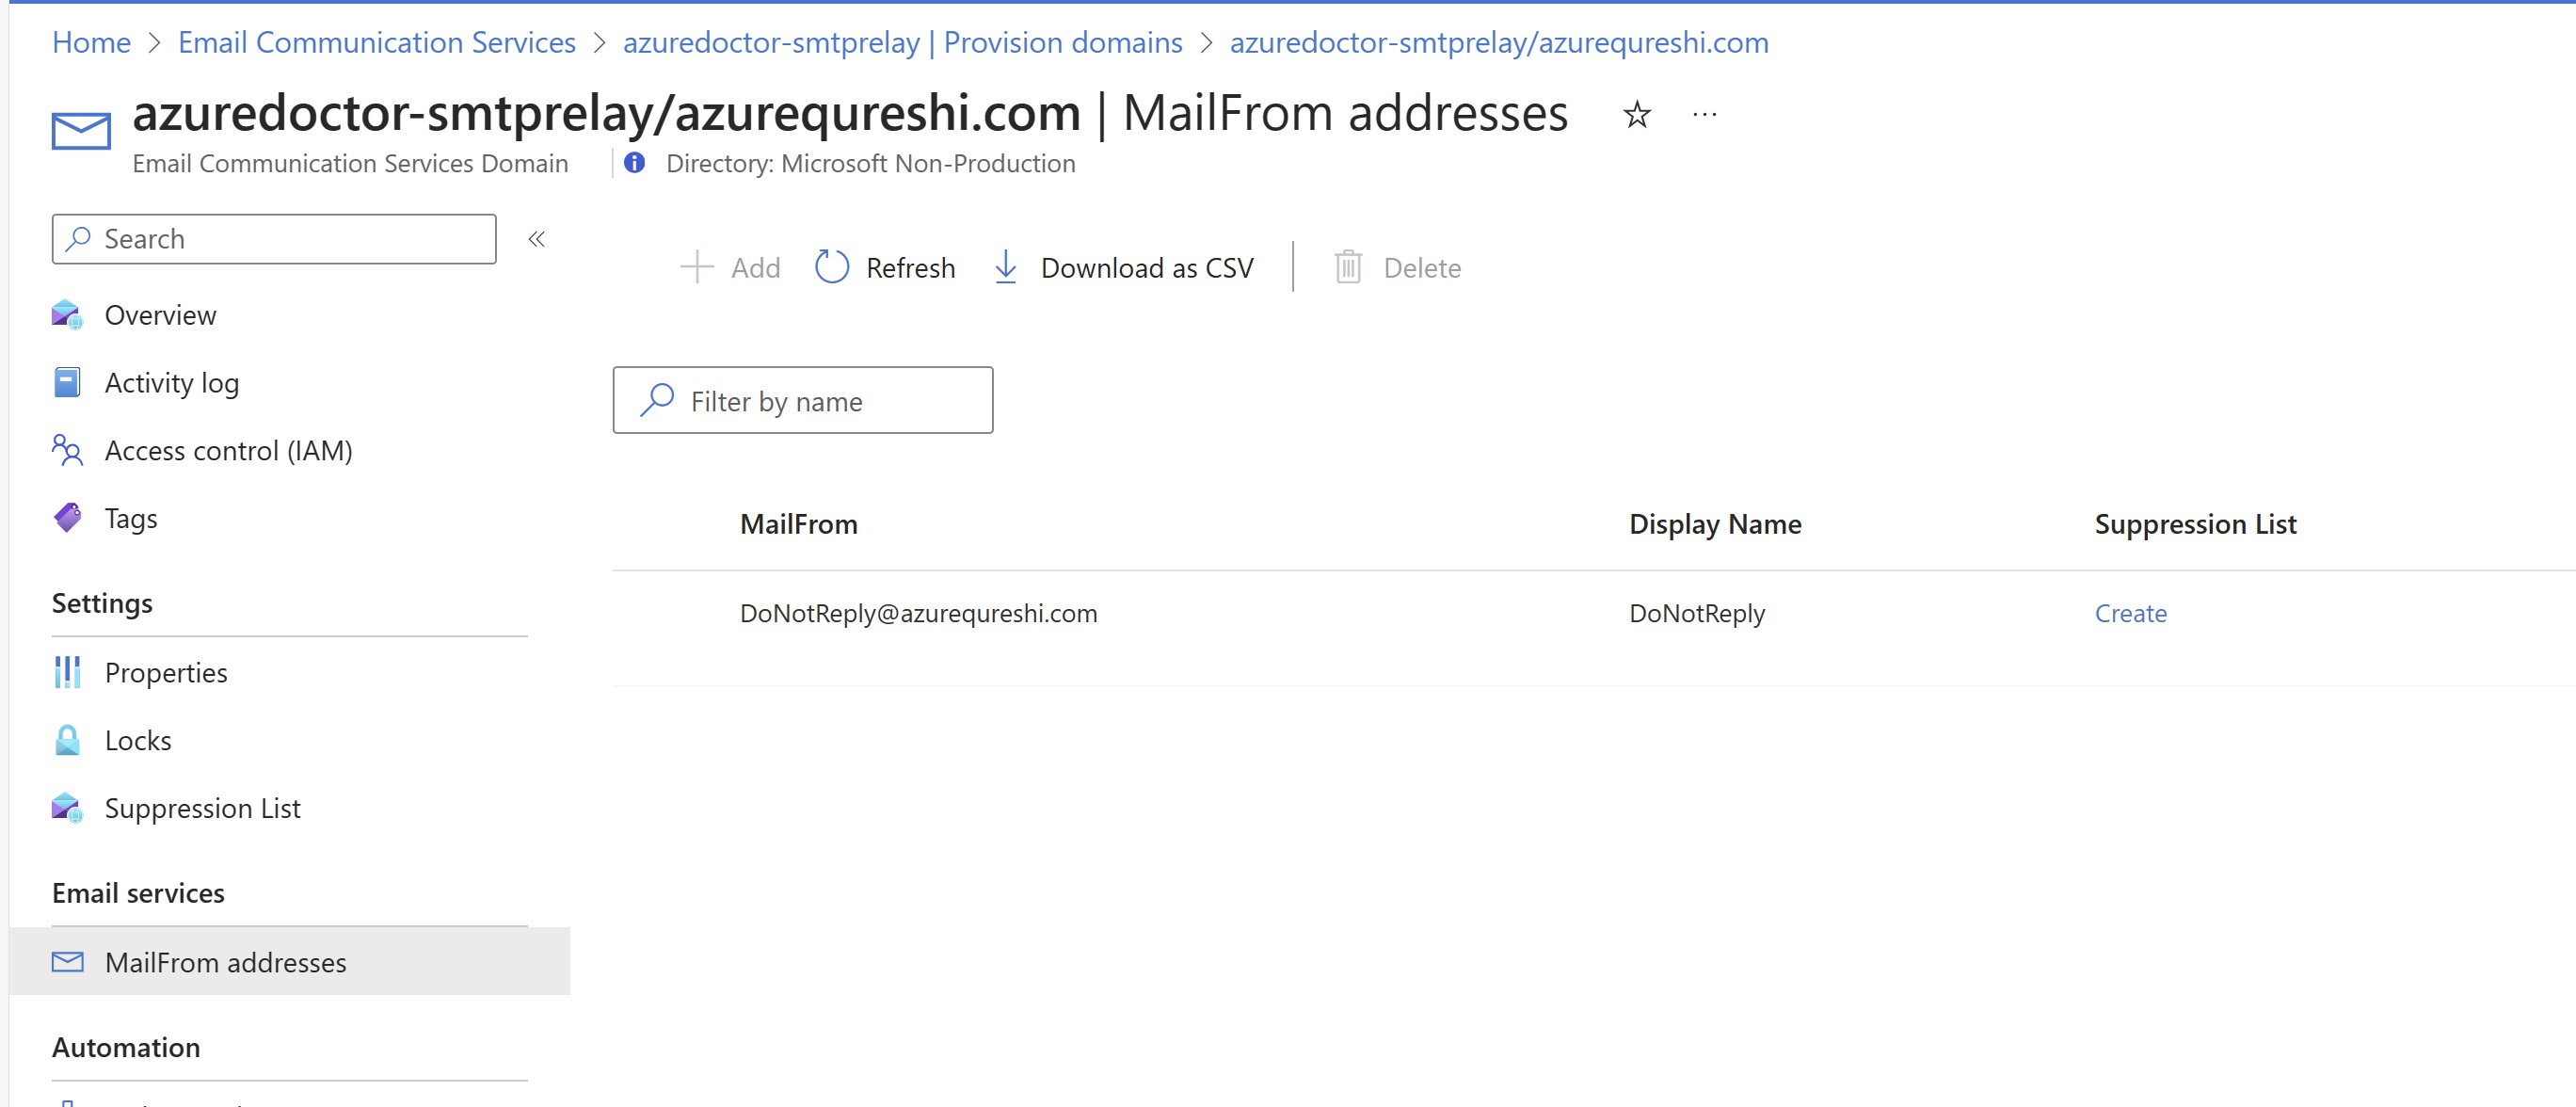
You can add custom sender usernames, click the link to see how to achieve this. Multiple sender address
You’ll need credentials to authenticate to the service.
- Username is < Azure Communication Services Resource name>. < Entra Application ID>. < Entra Tenant ID>
- Password is the client secret which you’ve generated.
- Port that we’ll need to use is 587
- SMTP server address is smtp.azurecomm.net
Now you can use any third party application to send email via the above parameters. To showcase we can use powershell with the same parameters to send emails.

1
2
3
4
5
6
7
8
9
10
11
# Azure Communication Service SMTP Relay Test Script

$From = "DoNotReply@azurequreshi.com"  # Your verified domain
$To = "recipient@outlook.com"
$Subject = "Test Email from Azure Communication Service SMTP Relay"
$Body = "Azure Communication Service supports SMTP relay"

$Credential = Get-credential

Send-MailMessage -From $From -To $To -Subject $Subject -Body $Body -smtpserver "smtp.azurecomm.net" -port 587 -Usessl -credential $Credential
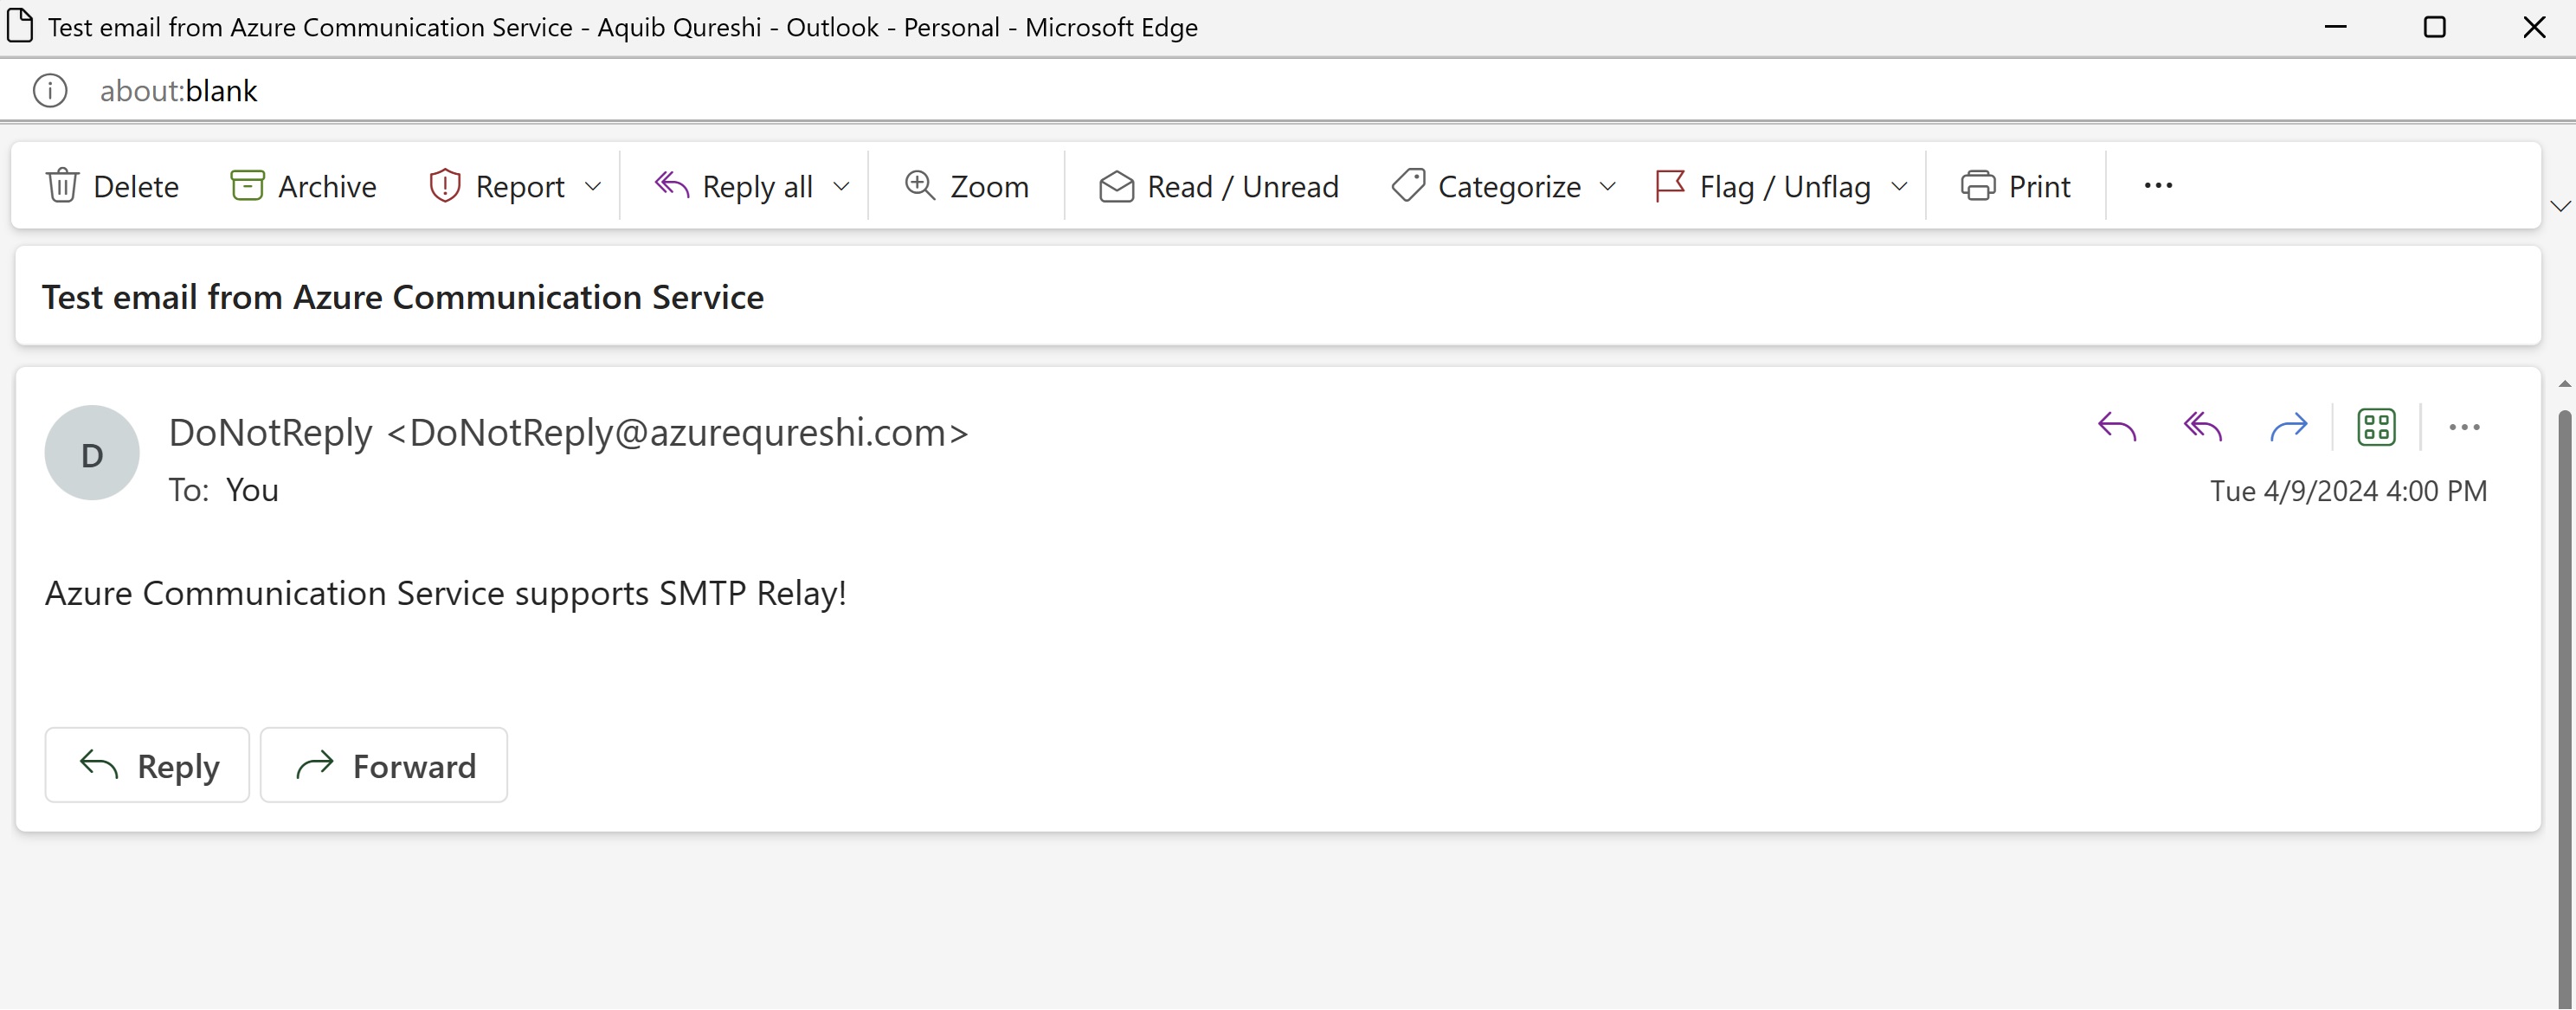
Conclusion: I trust this guide helps you in configuring SMTP relay and send emails from your custom or third party application without any change to the application/code.
Check part 2 of this blog here
Share the blogpost if you like it.
Happy Learning!
Subscribe to my newsletter for the latest posts and summaries. Your privacy is paramount, and your email stays with us securely. click the link to submit your email. https://forms.office.com/r/6ysKm4nkp4